
You connect your second monitor to your PC with an HDMI cable, but the monitor is not detected. What’s the cause and how to fix this issue? Not to worry. This is a common issue occurring to HDMI monitors. In this post, you’ll learn how to fix it easily. Read on to find the possible solutions.
Following are the seven methods you can try to fix the HDMI monitor not detected issue. Try them one by one until you find the one that works for you.
Method 1: Check the HDMI cable
Method 2: Check the HDMI ports (for desktops)
Method 3: Run Hardware and Devices troubleshooter
Method 4: Change display settings
Method 5: Re-enable the graphics card devices
Method 6: Update graphics card drivers
Method 7: Enable the integrated graphics card in BIOS
Method 1: Check the HDMI cable
Before moving on to more complex steps, the first thing you should do is to check your HDMI cable.
Firstly, unplug the HDMI cable from both the monitor and your PC. Wait for a few minutes then replug it at both ends. Ensure it’s firmly inserted into both ends. After that, check if the issue still persists.
If it still persists, unplug the HDMI cable again and fully check the cable to see if it’s physically damaged. If possible, test with another HDMI cable. If the issue is gone with another HDMI cable, the original cable is the culprit.

If you ensure the HDMI cable is not the culprit, go ahead to try other methods.
Method 2: Check the HDMI ports (for desktops)
For desktops, In many cases, the HDMI not detected issue is caused by using the wrong HDMI port.
You can plug the monitor into the HDMI port on your motherboard or the HDMI port on the graphics card. But plugging the monitor into the HDMI port on the motherboard can cause display performance issues like the monitor not detecting issues. That’s because your PC may not have an integrated graphics card or the integrated graphics card may not be enabled in BIOS.
So check if you plugged the monitor into the port on the motherboard but not the graphics card. If yes, switch it to the graphics card, then the HDMI monitor should be detected. If you still want to use the HDMI port on the motherboard, you can enable the integrated graphics card manually to have the monitor detected. About how to do it, see Method 7.
Tip: How to verify the motherboard ports and the graphics card ports?
Usually, graphics card ports are horizontal and are located on your computer case’s rear bottom part. And motherboard ports are vertical and are located on the rear side of the computer. For modern computers, motherboard ports usually sit above the graphics card ports.
Method 3: Run Hardware and Devices troubleshooter
Windows has the built-in Hardware and Devices troubleshooter which can help troubleshoot and fix hardware related issues like the HDMI monitor not detected issues. You can try to run it and see if it works for you. Follow these steps:
1) On your keyboard, press Win+R together to invoke the Run box.
2) Type “cmd” into the Run box and click OK. Then the Command Prompt window will open.

3) At the Command Prompt window, type the following command, and then press Enter.
msdt.exe -id DeviceDiagnostic
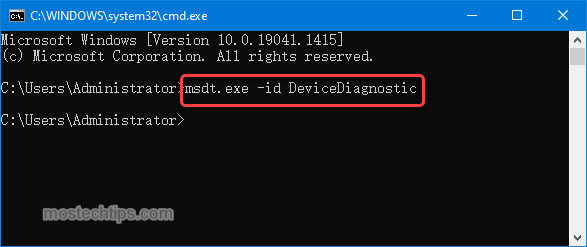
4) Once the Hardware and Devices window pops up, click Next.
Then Windows will start detecting any hardware issues. You just need to follow the on-screen instructions to complete the process.
If this method doesn’t work for you, continue to try Method 4.
Method 4: Change display settings
When your monitor cannot be detected, it’s always a good idea to check the display settings and ensure the settings are configured correctly. To do so:
1) On your keyboard, press Win+P together to load the display settings menu. On the display settings menu, you’ll see four options you can choose:
- PC screen only — Only using the first monitor
- Duplicate — Displaying the same content on both monitors
- Extend — Using both monitors to display an extended desktop
- Second screen Only — Only using the second monitor
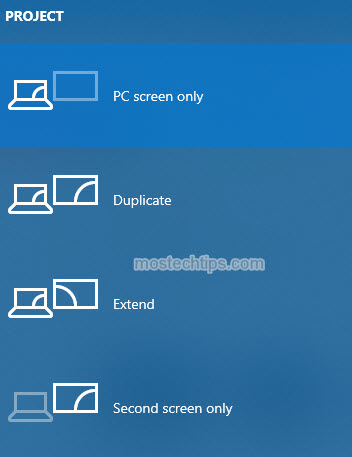
2) Since you encounter this issue while connecting two monitors, ensure either the Duplicate option or the Extend option is selected. If not, click on one of them per your requirement then the issue should be fixed.
If this method doesn’t fix the issue, continue to try Method 5.
Method 5: Re-enable the graphics card devices
Re-enabling the graphics card devices may help fix the HDMI monitor not detected issue. Here’s how to do it:
1) Open Device Manager.
2) Double-click on Display adapters to expand the category.
3) Right-click on one graphics card device and select Disable device.

4) Right-click on the graphics card device again and select Enable device.
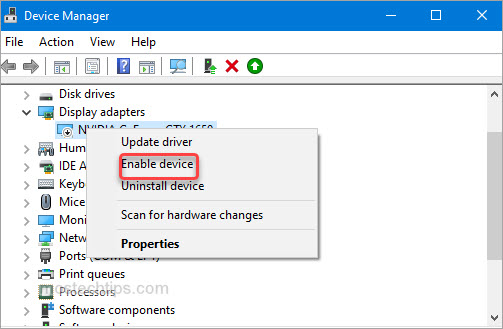
5) Repeat the above steps to re-enable another graphics card device.
6) Check to see if your HDMI monitor is detected.
If this method doesn’t work for you, you can try updating the graphics card drivers (see Method 6).
Method 6: Update graphics card drivers
The HDMI monitor not detected error can be caused by faulty or outdated graphics card drivers. To fix the error, you can try updating the graphics card drivers.
If you don’t have the time or computer skills to update the graphics card drivers manually, you can do it automatically with Driver Easy.
With Driver Easy, you can update a driver easily without verifying the PC model, the device model or the Windows version. All you need is several clicks. Most importantly, you don’t need to worry about downloading a wrong driver.
Here’s how to use Driver Easy to update the graphics card drivers.
1) Download and install Driver Easy Free on your computer.
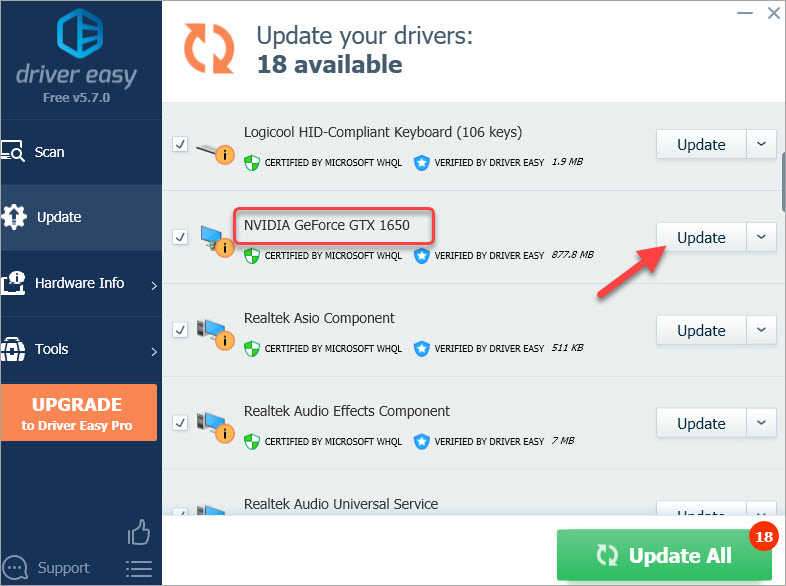
2) Launch Driver Easy and then click Scan Now, then Driver Easy will scan your computer and detect any problem drivers. The process may take several seconds. Once done, you’ll see a list of drivers that can be updated.

3) Locate the graphics card driver then click the Update button next to it, then the driver will be downloaded automatically. After the driver file is downloaded to your computer, you can follow the step-by-step guide from Driver Easy to install the driver easily.
If you upgrade to Driver Easy Pro, you can update the graphics card driver with just one click. Click the Update button, then the driver will be downloaded and installed automatically.
Method 7: Enable the integrated graphics card in BIOS
If you’re plugging the monitor into the port on the motherboard, the monitor may not be detected as the integrated graphics card may be disabled in BIOS. In that case, to fix the issue, you can enable the integrated graphics card in BIOS. To do that, following steps are for your reference:
1) Reboot your computer.
2) On the boot screen, repeatedly press the key that allows you to access BIOS. The keys would be like F1, F2, F8, F12, Delete or Escape. It varies depending on motherboard.
Tip: You can tell what button to press from a prompt on the boot screen. Or you can refer to your motherboard’s owner’s manual.
3) Once you’ve accessed the BIOS menu, go to your Advanced Settings and then select System Agent Configuration.
4) Select Graphics Configuration.
5) Look for the option Enable GPU or Integrated Graphics or IGPU Multi-Monitor.
6) Ensure the setting is enabled. If not, enable it. Once done, reboot your computer for the changes to take effect and your HDMI monitor should be detected.
Final tip: If none of the methods works for you, your HDMI ports probably are broken. It’s recommended you take it to a professional to get it repaired.
Hopefully you find the article helpful. If you have any questions, feel free to leave me a comment. I’ll get back to you once I see your comment.