
No sound after Windows 10 Update? Don’t worry. Many Windows 10 users have resolved the same problem with the methods in this post. You can also try these methods to resolve the Windows Update no sound problem.
Why can Windows Update cause the sound missing issue? Because incorrect audio drivers could be installed via Windows Update and the sound settings could be wrong. You can have your computer sound back with the following methods.
Method 1: Uninstall and reinstall the audio driver
To resolve the Windows 10 Update no sound issue, you can try to uninstall and reinstall the audio driver. Follow these steps to uninstall and reinstall the audio driver.
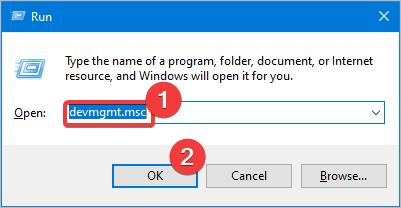
1. On your keyboard, press the Win+R (the Windows logo key and the R key) at the same time to invoke the Run box.
2. Type devmgmt.msc into the box and click OK.
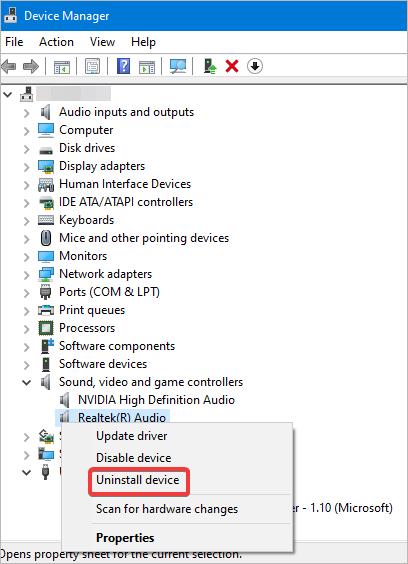
3. Expand the category Sound, video and game controllers. Right-click on the audio device and select Uninstall device. In my case, the audio device is Realtek Audio. Your audio device could be different from mine, just select your audio device and follow the instructions.
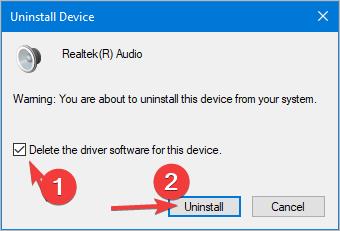
4. On the Confirm Device Removal dialogue, you’ll see a warning message that says “You are about to uninstall this device from your system”. Just check the box Delete the driver software for this device then click Uninstall to confirm the changes.
5. Restart your computer for the audio driver to reinstall. Check to see if you computer sound is back.
If Method 1 doesn’t work, you may need to update the audio driver. Go to Method 2.
Method 2: Update the audio driver
Updating the audio driver may get your computer sound back. To update the audio driver, you can go to your computer manufacturer’s website to download the latest audio driver. For example, if you’re using Dell desktop, go to Dell’s site to look for the latest audio driver.
If it’s not easy for you to download the driver manually, you can use a driver updater. It’s easy to google a trustworthy driver updater. Using a driver updater to help update the audio driver automatically can save you a lot of time. But note that some driver updaters have annoying ads on them. You need to skip these driver updaters.
If the above two ways don’t work for you, you can update the driver via Device Manager. Follow these steps:
1. On your keyboard, press the Win+R (the Windows logo key and the R key) at the same time to invoke the Run box.
2. Type devmgmt.msc into the box and click OK.
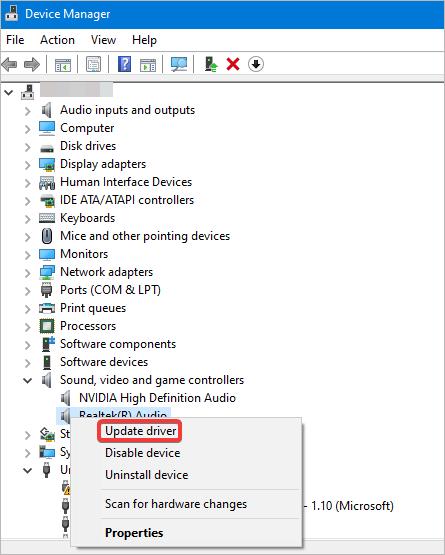
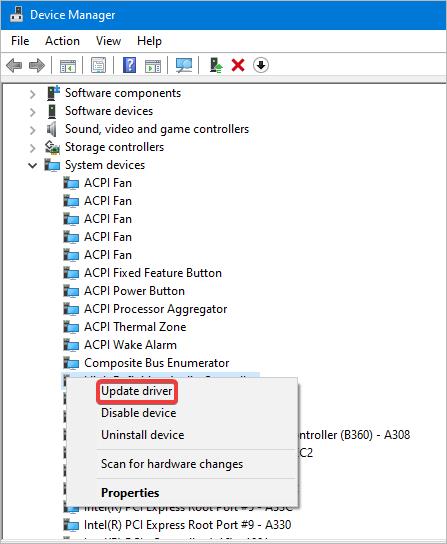
3. Expand the category Sound, video and game controllers. Right-click on the audio device and select Update driver.
4. Select Search automatically for updated driver software.
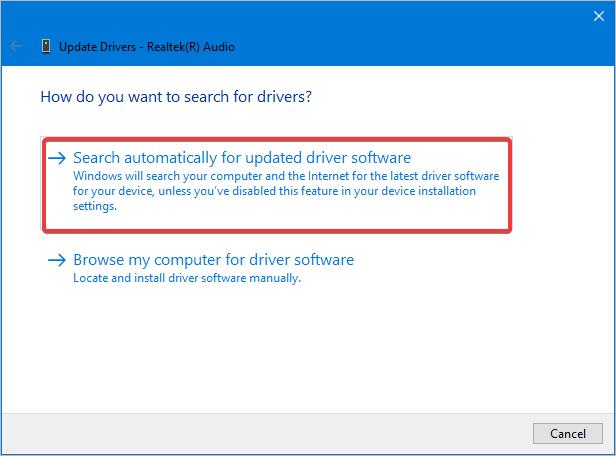
The system will search online for the driver. Just wait for the process to finish.

If a new driver is available, Windows will install the driver automatically. Then check to see if the sound missing issue is resolved.
Method 3: Update the audio driver that has SST in it
Go to Device Manager and check if the audio driver has SST in it. If the audio driver has SST in it, you can update the driver to High Definition Audio driver.
Firstly, open Device Manager. Secondly, expand the category Sound, video and game controllers and see if the audio driver has SST. If you do not see a SST driver under this category, expand the category System devices and check if the audio driver has SST. Once you find the audio driver that has SST, follow the below steps to update the driver.
1. Right-click on the device and select Update driver.
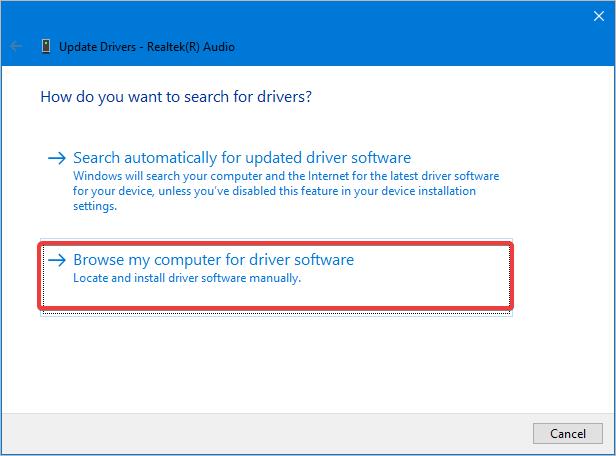
2. Select Browse my computer for driver software.
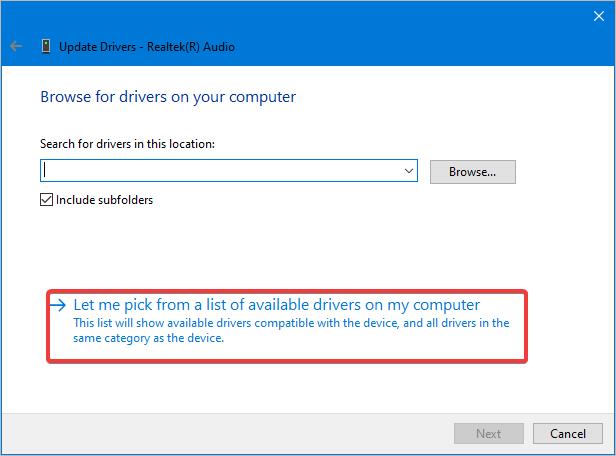
3. Select Let me pick from a list of available drivers on my computer.
4. Ensure the box Show compatible hardware is checked. Select High Definition Audio Device.
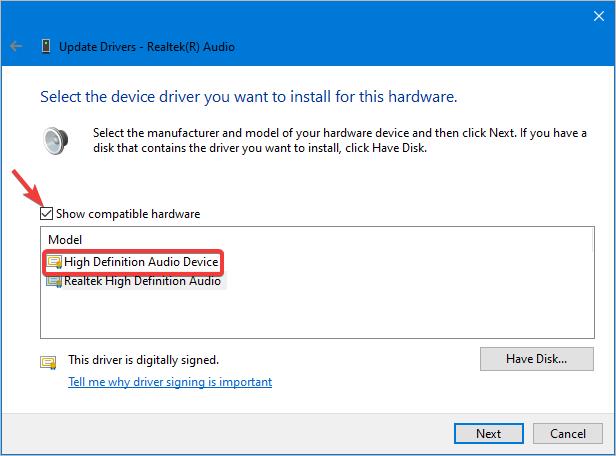
5. Click Next and follow the on-screen instructions to install the driver.
6. After the driver is installed, check to see if the sound issue is resolved.
Method 4: Ensure the speaker audio device is set as default
If the speaker audio device is not set as default, you can’t hear sound from your computer. So you need to ensure the speaker audio device is set as default. To do so:
1. On your keyboard, press the Win+S (the Windows logo key and the S key) at the same time to open search. Type ‘settings’ in the search box and click on Settings.

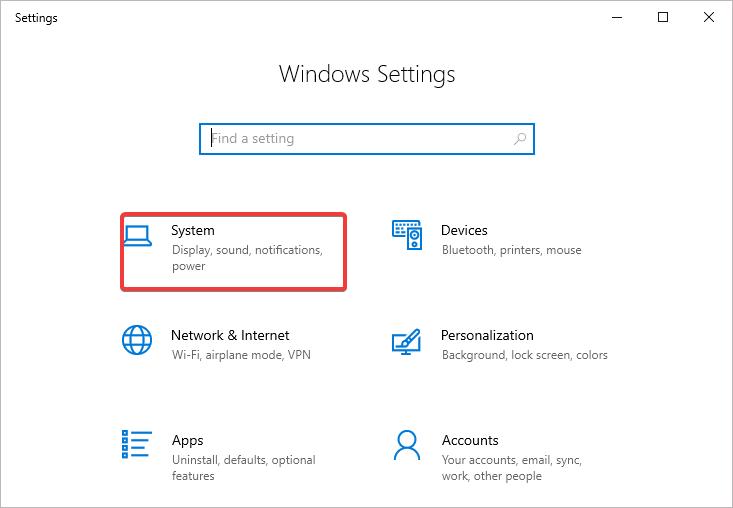
2. Select System.
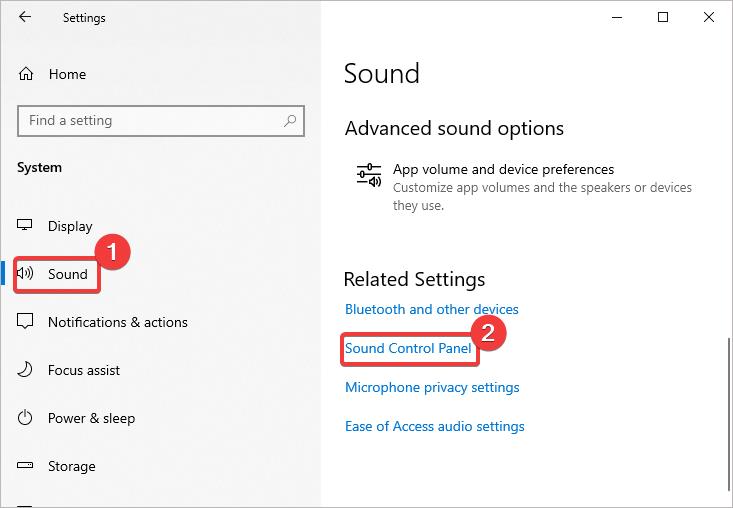
3. Select Sound in the left pane. In the right pane, select Sound Control Panel under the Related Settings section.
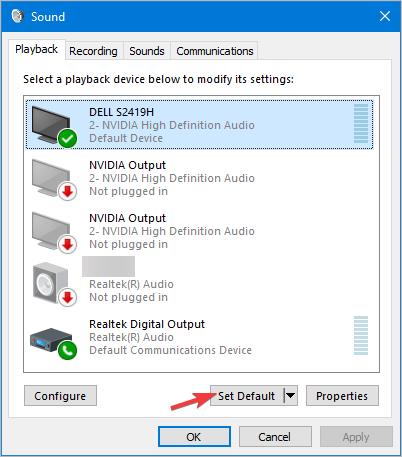
4. Select your speaker audio device and see if it’s set as your default device. If it’s not set as a default device, click Set Default then click OK to save the changes.
5. Restart your computer and see if the sound issue is resolved.
Hopefully you find the above methods helpful. If you have any questions, ideas or suggestions, feel free to leave a comment below.