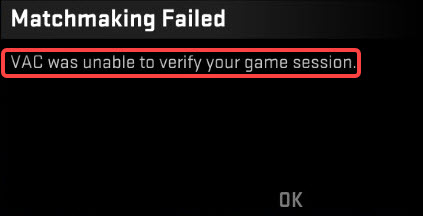
When you’re playing the game, you run into the error “VAC WAS Unable to Verify Your Game Session”. That makes your game experience extremely bad. I feel your pain. But don’t worry. In this guide, we’re going to roll up our sleeves and troubleshoot this issue together. So, get ready and let’s get into it.
What Causes this Error?
Before we jump into the solutions, let’s break down what this ‘VAC Was Unable to Verify Your Game Session’ error is all about. VAC stands for Valve Anti-Cheat, an automated system designed to detect cheats installed on users’ computers.
VAC is good as it ensures a fair and cheat-free gaming experience. But sometimes, it can throw errors at us, like this error.
Fortunately, you’re not alone when you run into this error. Many gamers have faced the same issue, and it’s often triggered by a handful of common culprits. These include poor network connection that make VAC unstable, the conflict caused by your security software, and even corrupted game files.
How to Fix the ‘VAC Was Unable to Verify Your Game Session’ Error
Following, we’ll list the possible solutions to fix the ‘VAC Was Unable to Verify Your Game Session’ error. Remember, it’s all about taking things one step at a time. Try each solution, and remember to test your game after each solution. Now, let’s dive into the solutions and see if the error can be fixed!
Solution 1: Checking Network Connection
Just so you know, VAC needs a solid connection to verify your game session. If the network connection is bad, VAC won’t work properly and then can cause the error. So, the first thing you should check is the network connection and make sure it’s good.
You can do the following:
- Restart Your Router/Modem – Restarting your router/modem can make a big difference on improving the network connection, especially after you use the router/modem for a long time. Turn off your router/modem for about five minutes, and then start it again.
- Try Wired Connection – If you’re on Wi-Fi, consider switching to a wired connection which could be more stable.
- Disable Applications – If you have other applications running while playing the game, disable them all and see if it works. This solution may work especially when you have some bandwidth-hogging apps running in the background while you game.
To disable applications, press Ctrl+Shift+Esc to open Task Manager where you can end the running processes and startup applications.
If you ensure the network connection has no problems, try Solution 2.
Solution 2: Verifying Game Files
The error can be caused by corrupted game files. You can try verifying the game files and see if it helps fix the error. To do so:
1) Open your Steam library, and find the game with the error.
2) Right-click on the game and select Properties.

3) Select Local Files > Verify Integrity of Game Files.

4) Steam will start verifying the game files and repair the corrupted game files.
Solution 3: Clearing Steam Download Cache
Steam stores the download cache of games to make games launch faster. You should regularly clear the download cache in case it causes errors. If you haven’t cleared the download cache for a long time, do it now. It may help fix the error.
Here’s how to clear Steam download cache:
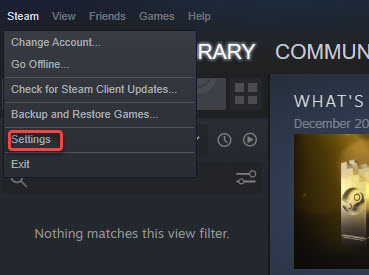
1) Launch Steam, click Steam in the upper left, and select Settings.

2) In the Settings window, select Downloads from the left sidebar.
3) Click the Clear Download Cache button. Then Steam will clear the download cache quickly.

4) Open Steam and run the game to see if the error is fixed.
Solution 4: Disable Conflicting Software
Security software is good to protect your system from being infected by viruses. However, it sometimes can cause some applications, especially games not to work properly. Disabling any running security software may help fix the ‘VAC Was Unable to Verify Your Game Session’ error.
Just temporarily disable your antivirus and firewall, and add your game and Steam to their whitelist.
Once done, relaunch Steam and then your game to see if the error is fixed.
Solution 5: Reinstall Steam
If none of the above solutions works, you may need to reinstall Steam. After a reinstallation, everything in Steam and your game will be reset.
Please note that all files will be deleted after reinstalling Steam. If you have important files, it’s recommended you backup your game files first.
To reinstall Steam:
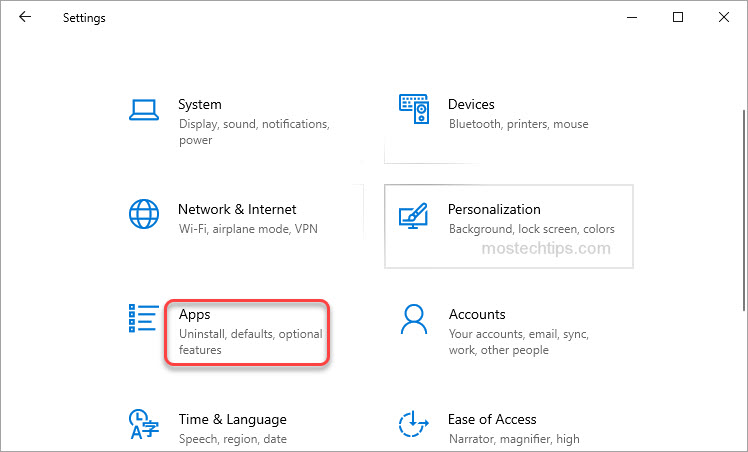
1) Go to Settings > Apps.

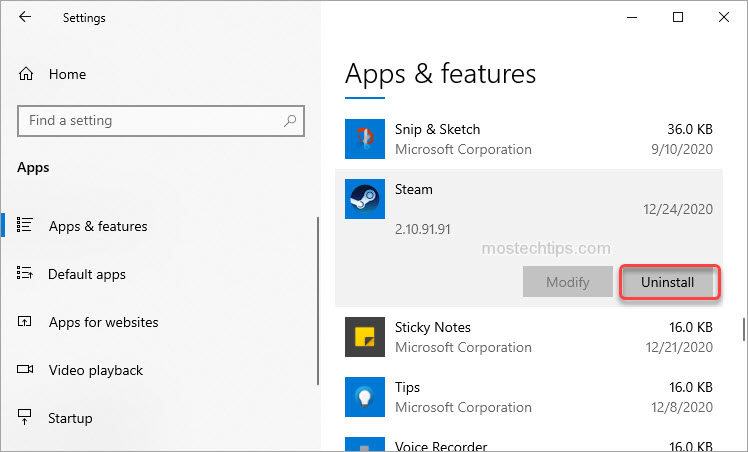
2) Locate Steam, and then uninstall it.

3) Go to the official Steam website, download the Steam client, and follow the installation steps to install it.
Bonus Tip: Keep Your System Optimized
To make games run smoothly, you should keep your system optimized. Following are the tips for you to maintain and optimize your system.
- Regularly clean up your disk – delete the unnecessary files or applications. Go to the page Clean Up Disk Space to learn the detailed instructions to clean up your disk space.
- Keep drivers updated – update drivers via Windows Update or install the latest drivers from the manufacturer’s official website. Alternatively, use a driver update tool like Driver Easy. Go to the Driver Easy official site where you can learn how to update drivers.
- Run system scans – run your security software to detect any virus on your computer.
FAQs about ‘VAC Was Unable to Verify Your Game Session’ Error
Q1: Why does CS:GO say VAC was unable to verify your game session?
A: This error pops up when VAC can’t confirm the legitimacy of your game session, usually due to network connection issues, security software conflicts, or corrupted files.
Q2: What does VAC was unable to verify mean?
A: It means that VAC, the anti-cheat system, couldn’t ensure the fairness of your game session, possibly due to connectivity or software issues.
Q3: How do I fix VAC authentication error?
A: You can fix it by troubleshooting your network connection, verifying game files, disabling conflicting security software, clearing Steam’s download cache, or even reinstalling Steam as a last resort.
Conclusion
In this guide, we’ve listed the common causes of the ‘VAC Was Unable to Verify Your Game Session’ error, the solutions to fix it and the tips to keep your system optimized. To fix this error, just try the solutions mentioned above.
Hopefully you find this post helpful. If you have any questions or suggestions, feel free to leave a comment below.

