When you try to play games, your laptop shuts off randomly. It could be frustrating. But not to worry. Many Windows users have reported this issue too. Some users have resolved the issue with one of the below methods. To fix the problem, you can also try these methods.
Try these methods
Method 1: Remove the battery while playing games
Method 2: Check if the laptop is overheating
Method 3: Update hardware drivers
Method 4: Scan for malware & virus
Method 5: User a new power supply
Method 1: Remove the battery while playing games
The problem could be due to dying batteries. If your laptop is using a battery when you’re playing games, you can remove the battery and check to see if the problem persists.
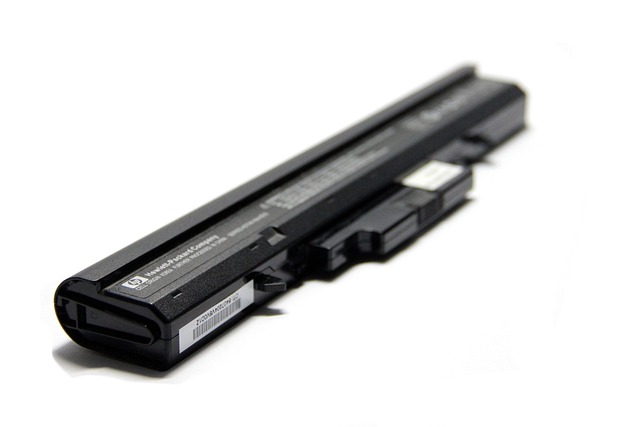
You can refer to the steps below to remove the battery from your laptop:
Before you get started, ensure your laptop is off and the power cable is disconnected.
1) Turn your laptop over so the bottom is facing up.
2) Find the battery latch at the bottom of the laptop.
3) Slide the latch switch to the opposite side and hold it in that position until the battery is released, then remove the battery.
Once the battery is removed, connect the power cable and turn on your laptop. Then play the game and see if the laptop shut down issue persists.
Method 2: Check if the laptop is overheating
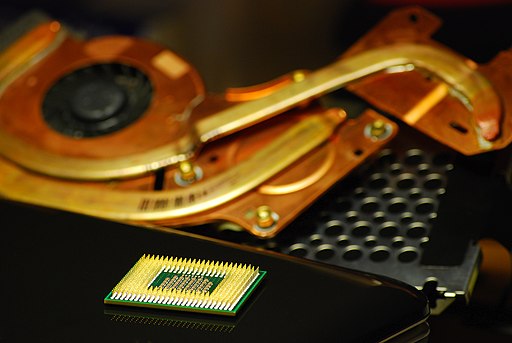
Playing games can easily cause laptop overheating. Once the laptop is overheating, it will shut down automatically to prevent any hardware damages. So to fix the problem, you should check if the laptop is overheating.
How to check if the laptop is overheating
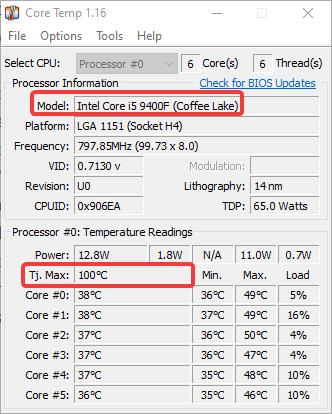
If your laptop’s temperature is over the processor’s maximum allowed operating temperature, we’ll call your laptop overheating. To determine if your laptop is overheating, the first thing you need to do is check the processor’s maximum allowed temperature, then use a free utility to view the current temperature, for example, Core Temp.
Each processor has their own maximum temperature. Intel defines Tjunction (TJ.Max) as the ‘maximum temperature allowed at the processor die’. For Intel’s processors, you can find the maximum allowed temperature on Intel’s website, or tell it from Core Temp (see the below screenshot). But for AMD processors and other brand processors, you need to search online as their manufacturers don’t provide a specific maximum operating temperature for their processors. Though nobody really knows 100% for sure the AMD processor’s maximum temperature, you can determine it from the range given by other users.
How to fix laptop overheating issues
Once you determine your laptop is overheating, you can follow the instructions below to make a change about it.
1) Configure power management settings
Laptop overheating could be a sign of power issues. The simplest solution to fix laptop overheating issues is to configure power management settings. This method has been confirmed by many Windows 10 users. You can give it a try.
To do so:
a) On your keyboard, press Win+R (the Windows logo key and the R key) at the same time to open Search.
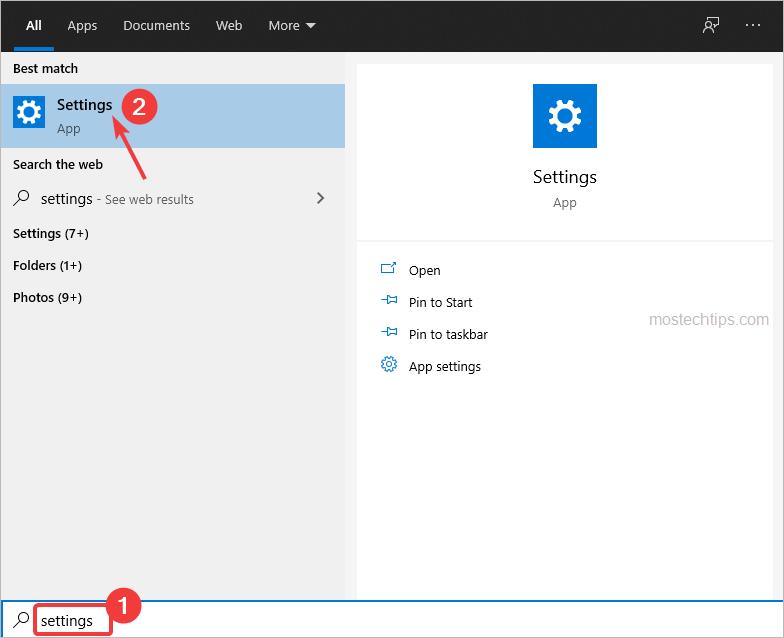
b) Type ‘settings’ into the search box and click Settings.
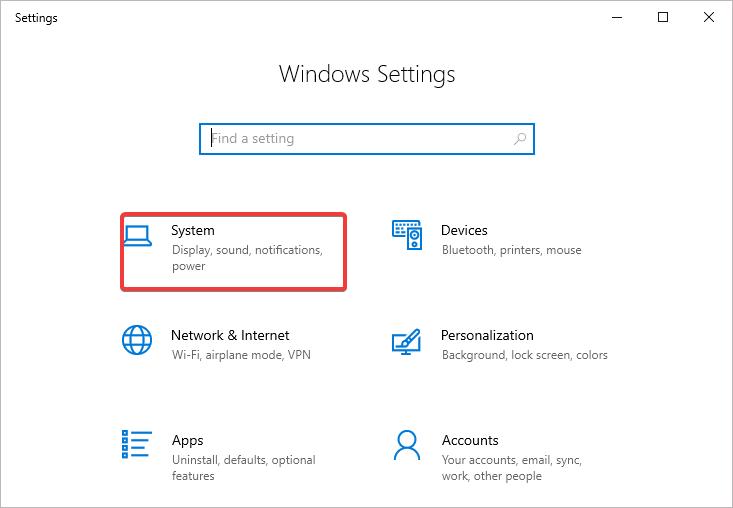
c) Select System.
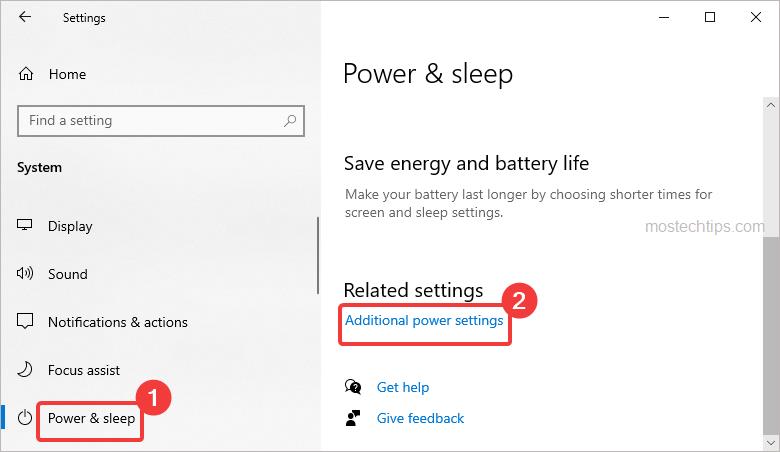
d) Click Power & Sleep and then click Additional power settings under ‘Related settings’.
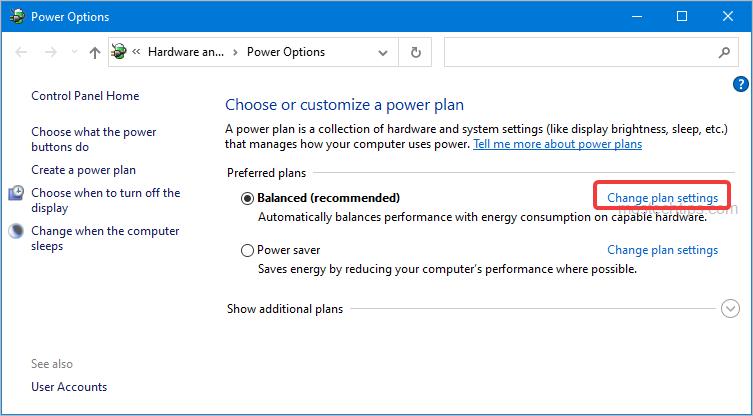
f) Click Change plan settings.
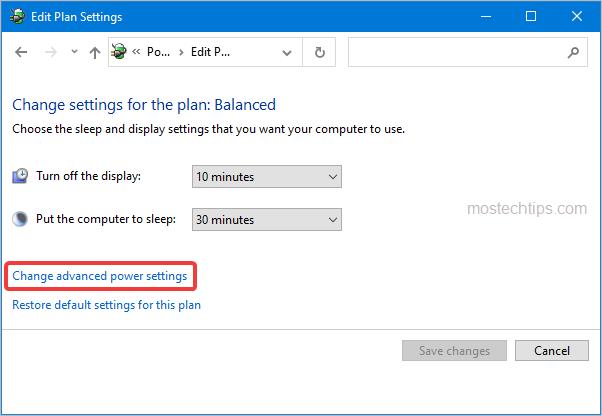
g) Click Change advanced power settings.
h) Expand Processor power management -> Maximum processor state, then you’ll See the Maximum processor state setting is 100%. Change the setting to a smaller number like 90%.
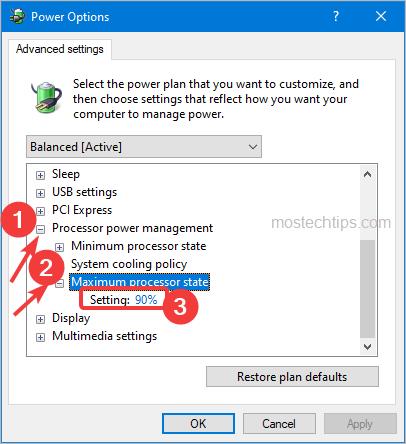
i) Click Apply -> OK to save the changes.
Once done, check to see if your laptop overheating issue is resolved.
2) Blow the dust from air vent
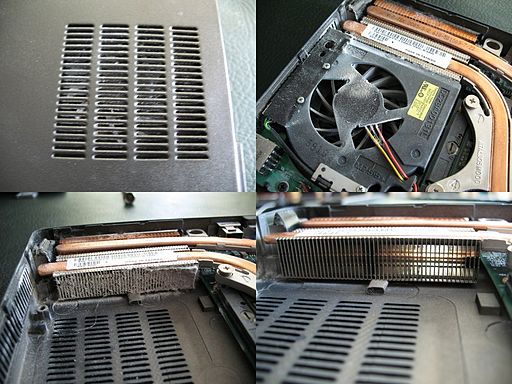
If the air vent is dusty, the heat inside the laptop cannot be drawn away effectively. Then overheating issues can occur. For most laptops, the air vent is located at the bottom. You can turn your laptop over so the bottom is facing up. After locating the air vent, you can use a can of compressed air to blow the dust.
The fan inside the laptop also can be dusty. If you have a laptop that makes the fan easily accessible, it’s recommended you blow the dust from the fan. To access the fan, you’ll need to unscrew the panels and lift out the fan. If you find it not easy for you to do that, skip cleaning out the fan or you can take the laptop to a computer repair store to have it fixed.
3) Check if the fan is running properly
Whenever your laptop gets overheating, you should check if the fan inside the laptop is running properly. Note you need to keep the laptop turned on when checking the fan. If you’re not comfortable with this, it’s recommended you contact an IT consultant for assistance.
Method 3: Update hardware drivers
Problematic hardware drivers can cause your laptop to shut down when you’re playing games, especially the outdated graphics card driver. To fix the problem, you can try to update the hardware drivers.
Since it’s not easy to find out what drivers could be the problem, it’s recommended you use a third-party driver update tool to help update drivers. Most driver update tools allow you to update all drivers with a few clicks. Driver Booster is one of the best driver update tools around the world. If you’re not sure what driver update tool is good to use, you can try Driver Booster.
Method 4: Scan for malware and viruses
Some malware and viruses are programmed to shut down the computer when you’re using them, for example, playing games. You can launch your anti-virus software to scan your computer to detect and kill the malware and viruses.

Method 5: Use a new power supply
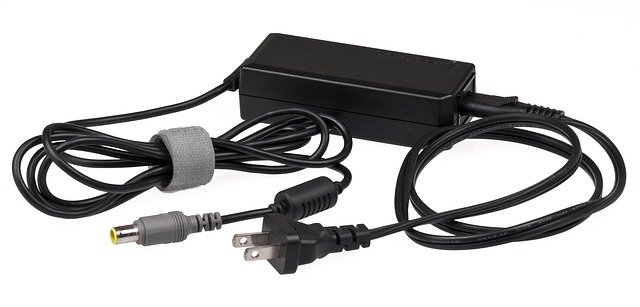
If the laptop shuts down when you’re playing games, a broken or old power supply could be the cause. You can buy a new power supply and see if the problem can be resolved. To buy a new power supply online, you’ll need to find out your laptop’s model number and the voltage requirements for the power supply. You can check these from your laptop’s user manual.
Hopefully you find this article helpful. If you have any questions, ideas or suggestions, feel free to leave a comment below.


