An in-place upgrade can fix some Windows problems by overwriting system files. It can be the last solution for many technical problems such as some Windows Update problems, start button not working issues. Your installed programs, personal files and data and some important settings won’t lose after an in-place upgrade. Since it’s so helpful, you may want to know how to perform an in-place upgrade with Windows 10. In this article, I’ll show you how.
Before an in-place upgrade
To ensure a successful in-place upgrade, you need to check these things before you start.
- Ensure you log into Windows with an administrator account.
- Disable or uninstall any third-party anti-virus programs which may interfere with the upgrade.
- Unplug all unnecessary external devices from your computer but keep the mouse, keyboard and LAN cable connected.
How to perform an in-place upgrade step by step
You can perform an in-place upgrade with Windows Media Creation Tool. Follow these steps:
1) Download Windows Media Creation Tool from Microsoft.

2) Double-click on the downloaded file.
If you get a UAC (User Account Control) prompt, click Yes.
3) Read the license terms and then click Yes to continue.

Then it might take a few minutes for Windows to get things ready.
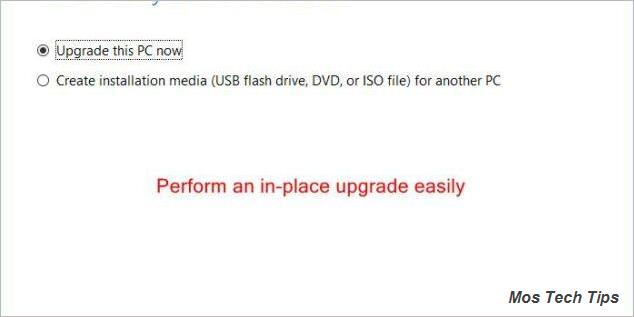
4) Select Upgrade this PC now and click Next.

Then the download will begin. Note that it may take a few minutes to finish downloading Windows 10.

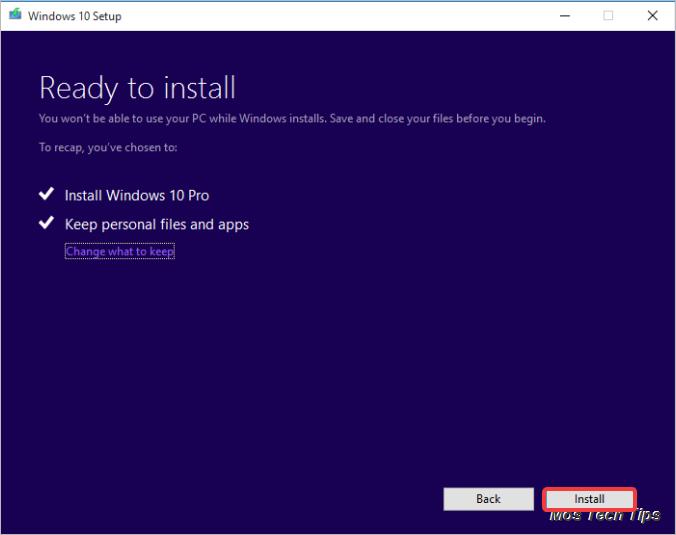
5) On the Ready to install screen, ensure ‘Keep personal files and apps’ is selected(it’s selected by default), and click Install to start installing Windows 10.

Then the install will automatically start. During the install, the PC will restart several times and this might take a while.
6) Once the install is done, you can choose the account that you’d like to log into Windows 10 then choose the Cortana settings you want.
That’s all. With the above steps, you can perform an-inplace upgrade for your PC. If you have any questions, ideas or suggestions, feel free to leave a comment below.

