
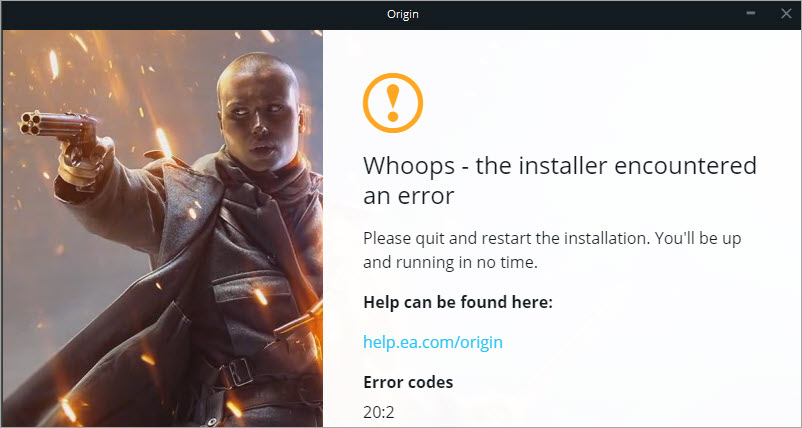
You can’t install or update Origin. When you try to do it, the software gives you the message “Whoops – the installer encountered an error – Please quit and restart the installation. you’ll be up and going in no time” accompany with an error code like 9:0, 7:0 and 20:2. That can be frustrating. But not to worry. Read on to find the solutions to fix it.
There are different causes for this error. To fix it, you can try the possible solutions below. Before you start, make sure you have enough disk space on C:\ to install Origin. If you don’t have enough space to install Origin, any other methods won’t work.
Note: Method 4, Method 5 and Method 6 only work if you encounter the error while updating Origin.
Method 1: Go back and try again
Method 2: Disable proxy server
Method 3: Run as administrator
Method 4: Clear Origin cache
Method 5: Remove some related files then try again
Method 6: Reinstall Origin
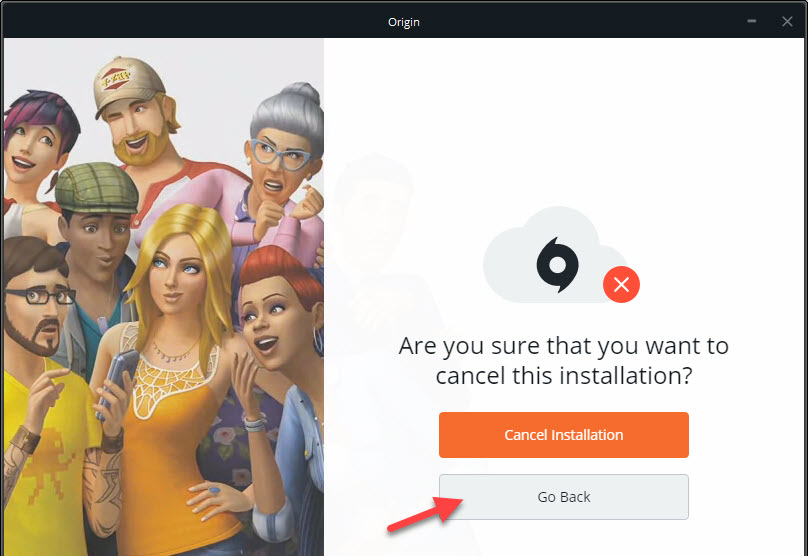
Method 1: Go back and try again
The trick to fix the error is click the Go back button then try again. When I encountered this error, I used this trick and was able to install Origin successfully. So just try it and see if it works for you.
On the error screen, click the X (the close button) then Origin will give you two options: Cancel Installation or Go Back. Click on Go Back then Origin will start installing again. It may install successfully this time.
If Method 1 doesn’t work for you, try Method 2.
Method 2: Disable proxy server
If you have proxy server enabled, you may not be able to install Origin and encounter this error. You can follow these steps to check the settings and disable the proxy server if you need.
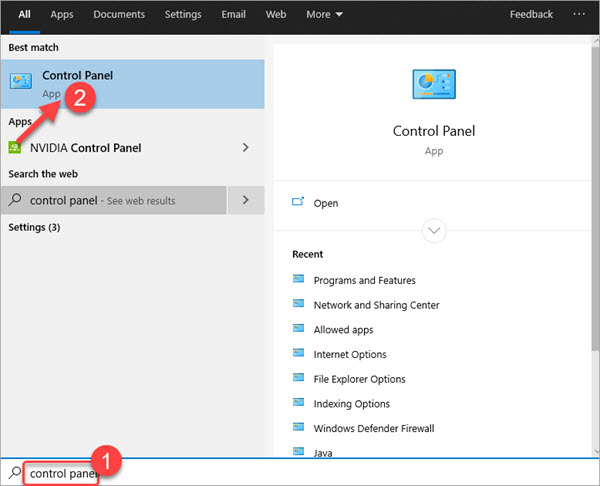
1) On your keyboard, press the Windows logo button then type “control panel”. Select Control Panel from the menu. Then the Control Panel window will pop up.
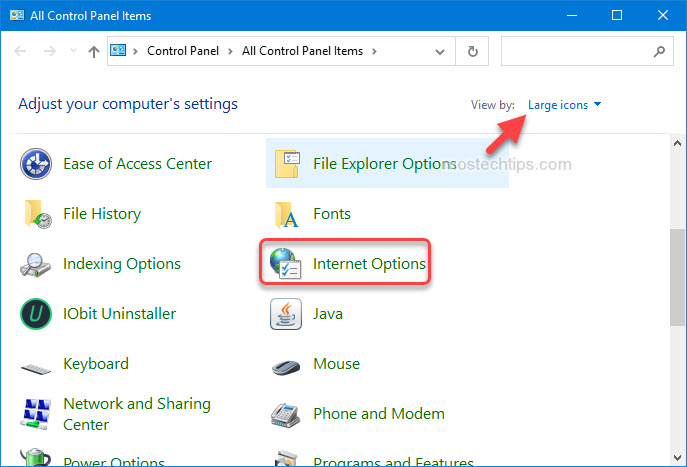
2) View by Large icons and click on Internet Options.
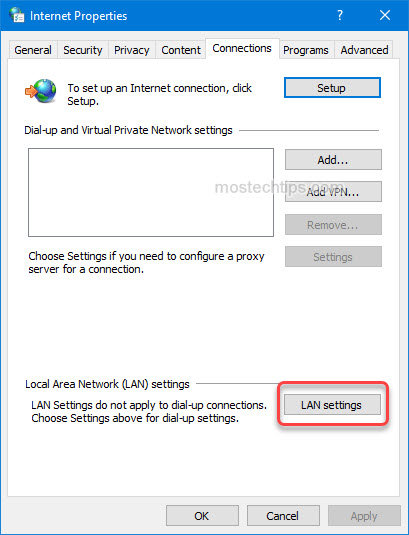
3) Under the Connections tab, click on LAN settings.
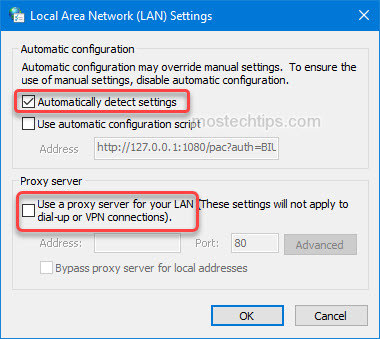
4) Check the box next to Automatically detect settings, and uncheck the box next to Use a proxy server for your LAN. If you don’t need to change anything, it means you don’t have a proxy server enabled. In that case, skip this method.
5) Click OK to save the changes.
6) Restart your computer and install or update Origin again. Check to see if the error still occurs.
If Method 2 doesn’t work for you, continue to try Method 3.
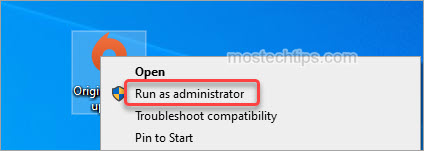
Method 3: Run as administrator
Some users have reported running the installer as administrator helped fix the error. You can try this method and see if it works for you. To do so:
Close Origin. Right-click on the Origin installer and select Run as administrator. Check to see if you can install Origin without the error.

If the error still occurs, continue to try other methods.
Method 4: Clear Origin cache
If you have Origin installed and encounter the error while trying to update Origin, clearing the cache for Origin may help fix the error. Here’s how to do it:
1) Ensure Origin or the installation process is exit.
2) On your keyboard, press Win+R (the Windows logo key and the R key ) at the same time to invoke the Run box.
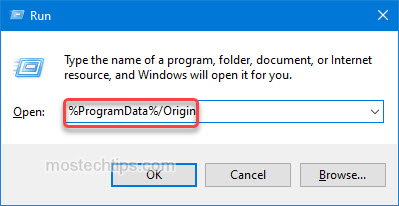
3) Type “%ProgramData%/Origin” into the Run box and click OK.
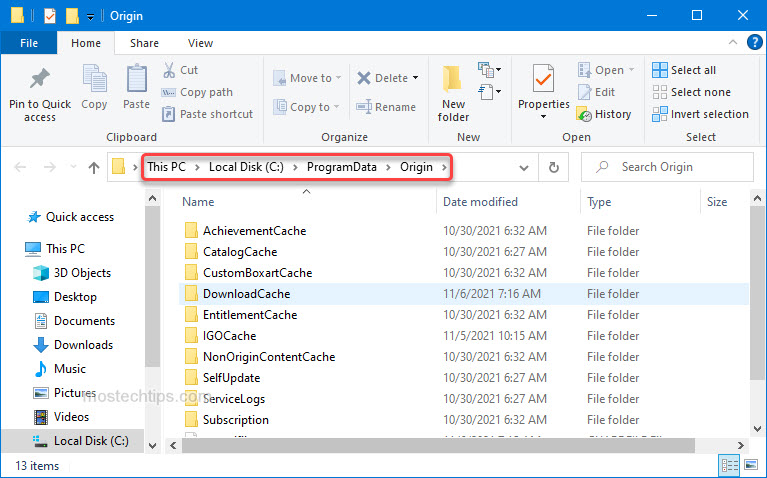
4) Inside the Origin folder, delete all the files and folders except for LocalContent (keeping the LocalContent folder will avoid integrity scanning while installing Origin).
5) Open the Run box again.
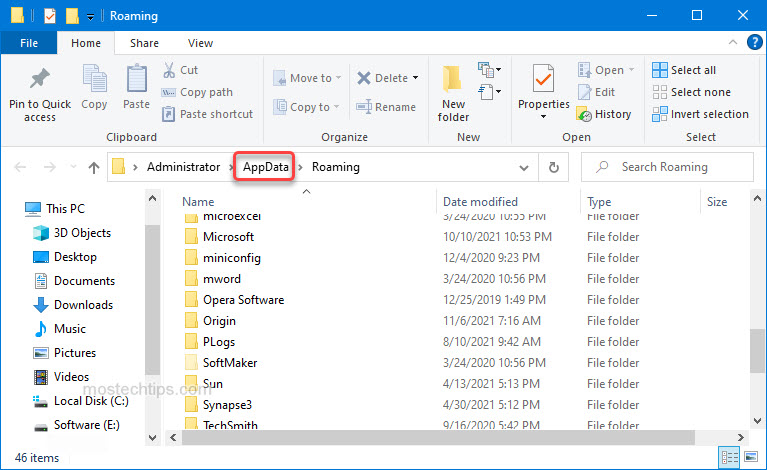
6) Type “%AppData%” into the Run box and click OK.

7) Inside the Roaming folder, locate and delete the Origin folder.

8) Click Appdata in the address bar.
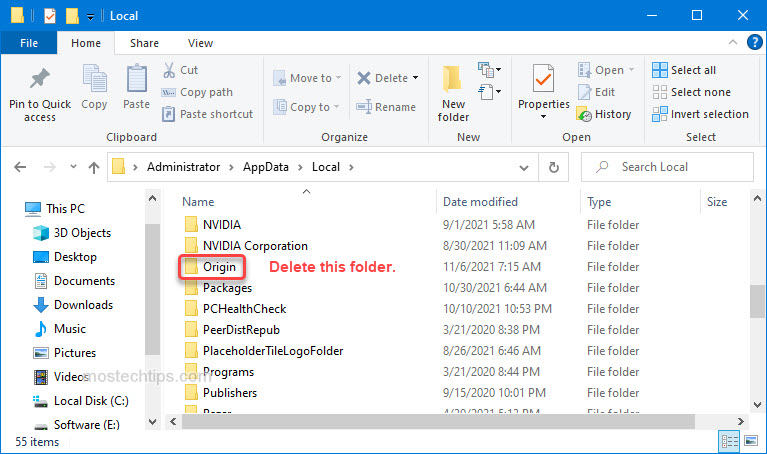
9) Open the Local folder.

10) Inside the Local folder, locate and then delete the Origin folder.
11) Restart your computer and update Origin again. Check to see if the error still occurs.
If the error still occurs, try Method 5.
Method 5: Remove some related files then try again
To fix the error, you can try removing some Origin related files then try updating Origin again. Follow these steps:
1) Ensure Origin is exit.
2) On your keyboard, press Win+R (the Windows logo key and the R key ) at the same time to invoke the Run box.
3) Type “%ProgramData%/Origin” into the Run box and click OK.

4) Inside the Origin folder, delete all the files and folders except for LocalContent (keeping the LocalContent folder will avoid integrity scanning while installing Origin).

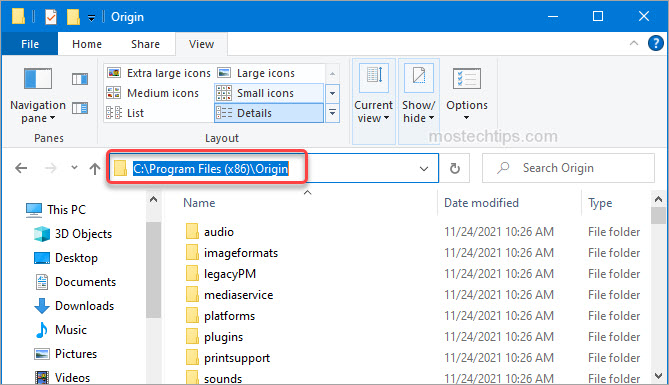
5) Go to C:\Program Files (x86)\Origin.
6) Locate and delete the OriginThinSetupInternal.exe file.
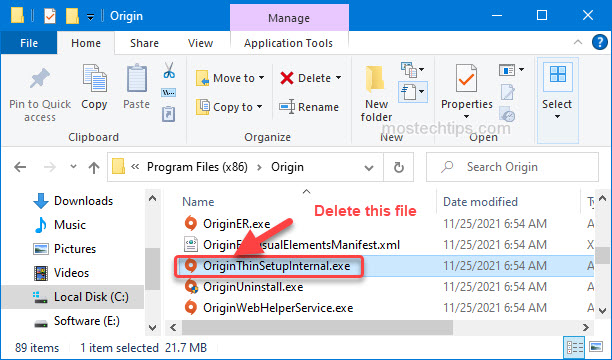
7) Right-click on the Origin installer and select Run as administrator. Then check to see if Origin can install without this error.
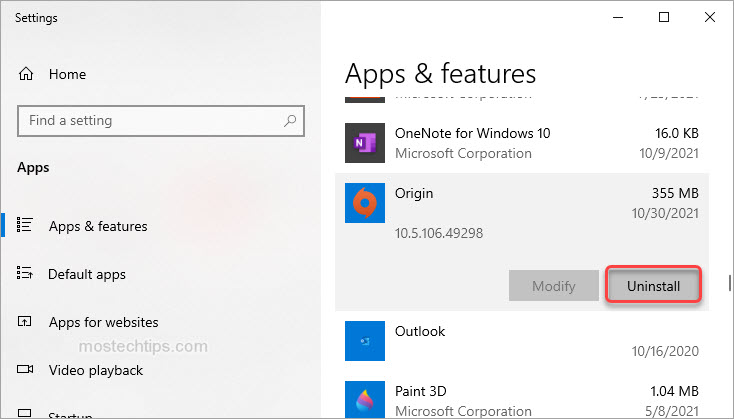
Method 6: Reinstall Origin
If none of the above methods works, the last resort to fix the error is to uninstall and install Origin again.
Firstly, uninstall Origin from your computer.
1) Right-click on the Start menu button at the lower left corner of the desktop and select Apps and Features.

2) Click on Origin and click Uninstall. Follow the on-screen instructions to uninstall the program.
Secondly, download and install the latest version of Origin, then launch it to see if the “Origin could not connect to internet” error is resolved.
Hopefully you find this article helpful. If you have any questions, feel free to drop a comment below. I’ll get back to you ASAP.
