
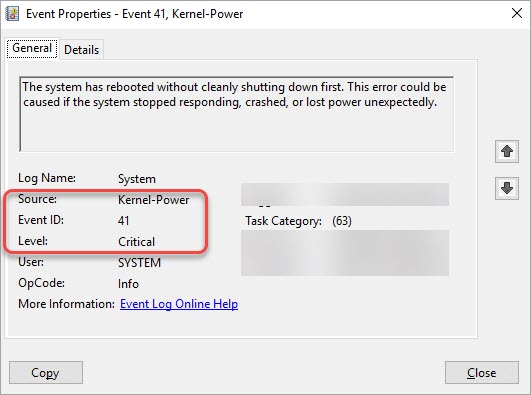
When the Kernel-Power Event ID 41 Critical error occurs (Task Category 63), your computer will restart automatically and randomly. This error is probably about power, drivers and hardware issues, and it usually occurs to Windows 10 desktop computers. To fix it, you can use one of the methods below.
Try these methods
Try these methods one by one until you find the one that works for you.
Method 1: Check all cables
Method 2: Remove all external drives
Method 3: Update the graphics card drivers
Method 4: Change the power settings
Method 5: Turn off fast startup
Method 6: Replace the PSU
Method 1: Check all cables
To fix the problem, the first thing you can do is check all cables and ensure they are connected without problems.
Firstly, check the power cable, and ensure it’s inserted tightly in the right place, both at the charger end and the computer end.
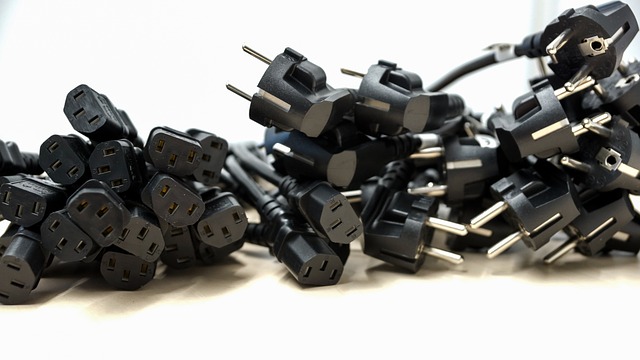
Secondly, check and ensure all cables within the computer are connected correctly.
If you ensure that all cables are connected without problems, and the Event ID 41 error persists, try other methods.
Method 2: Remove all external drives
External drives can draw power from your computer, then cause the Kernel-Power Critical 41 error. If you’re using some external drives such as external USB devices (aside from keyboard and mouse), remove them and see if the error occurs.
If the error is gone, the cause is the external drives.
Method 3: Update the graphics card drivers
Faulty graphics card drivers can result in Kernel-Power Critical 41 error. To fix the error, you can try to update the graphics card drivers on your computer.
To update the graphics card drivers manually, you can google the graphics card’s name, then go to the support page for the manufacturer, where you can find and download the graphics card drivers. Then you can double-click on the downloaded driver file, and follow the on-screen instructions to install the driver on your computer.
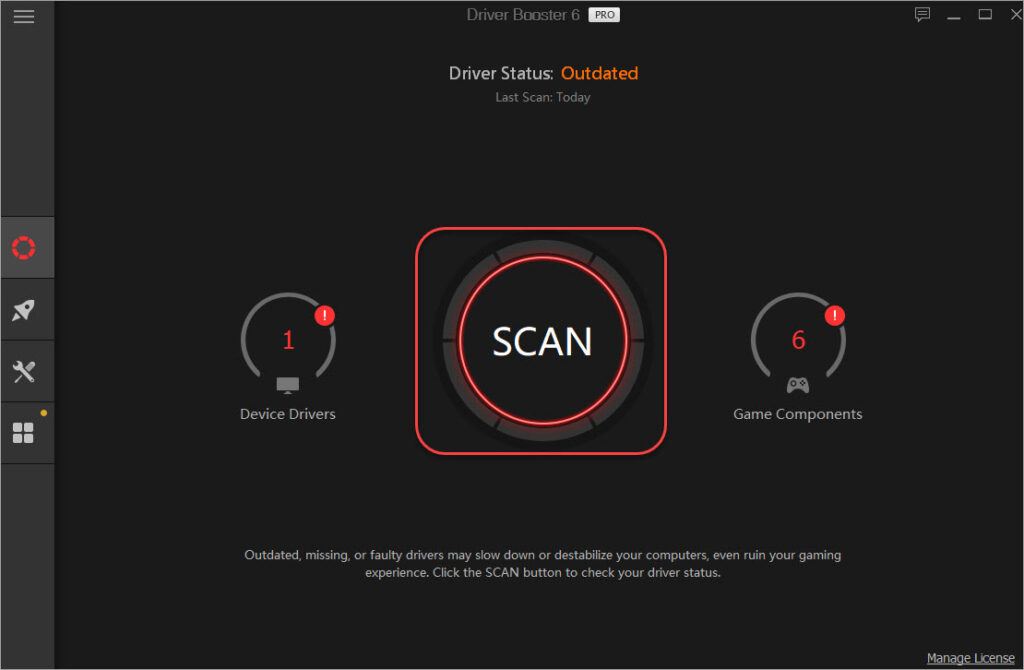
If you find it hard to update the drivers manually, you can do it automatically with Driver Booster.
With Driver Booster, you can update the graphics card drivers with just a few clicks.
1) Download and install it on your computer.
2) Launch it and click SCAN to scan your computer to detect any problem drivers.
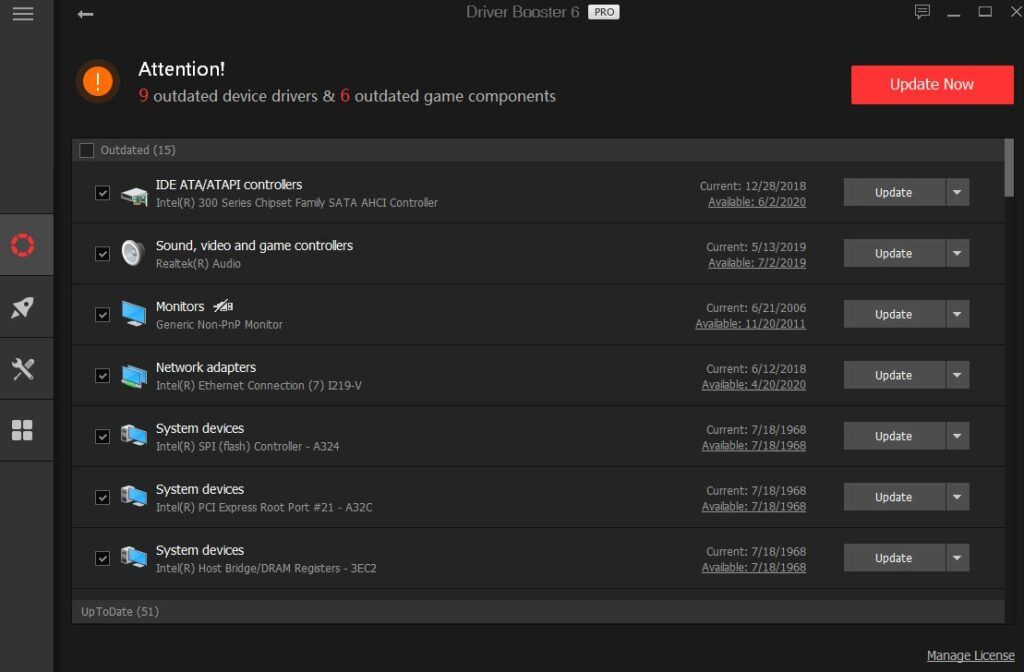
3) Click the Update button next to the graphics card driver to update the driver.
After updating the graphics card drivers, check to see if the Kernel-Power Critical Error 41 issue is resolved.
Method 4: Change the power settings
As mentioned above, this can be a power related problem. Changing the power settings to maximum performance may resolve the error. To do so:
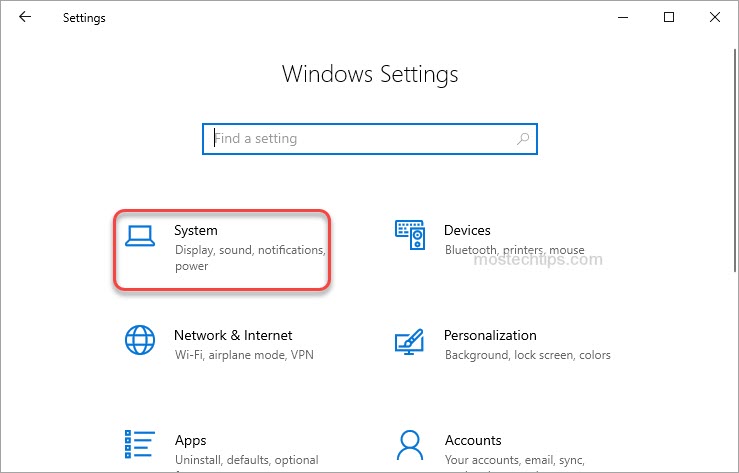
1) On your keyboard, press Win+I (the Windows logo key and the I key) at the same time open the Settings window.
2) Click on System.
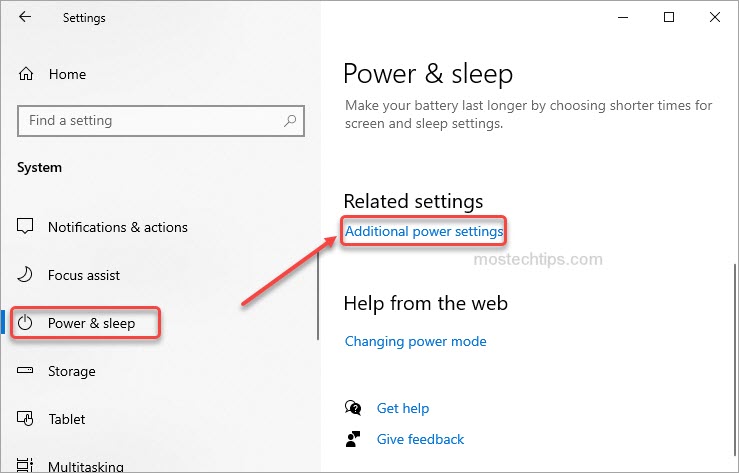
3) Click on Power & sleep on the left pane, then click on Additional power settings on the right pane.

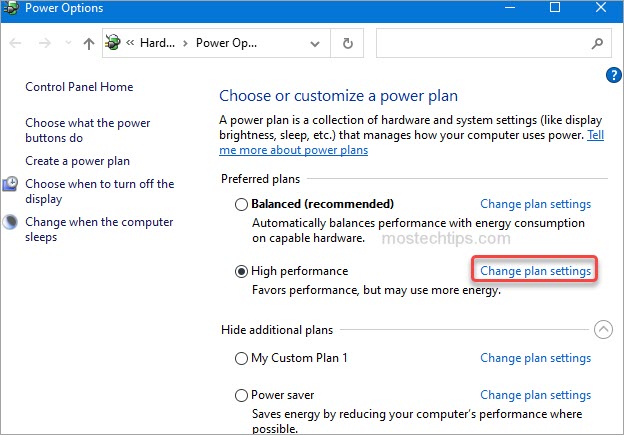
4) On the Preferred plans or High additional plans, select High Performance.

5) Click on the Change Plan settings link.
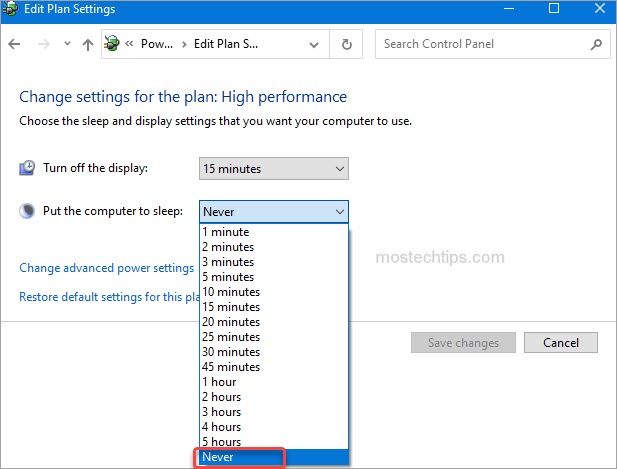
6) Select Never from the drop down menu of Put the computer to sleep.
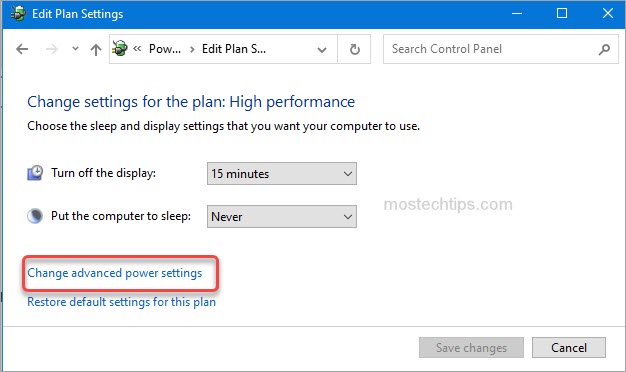
7) Click on Change advanced power settings to open the Power Options window.
8) On the Power Options window, expand Hard disk -> Turn off hard disk, and change the settings to 0 minutes.
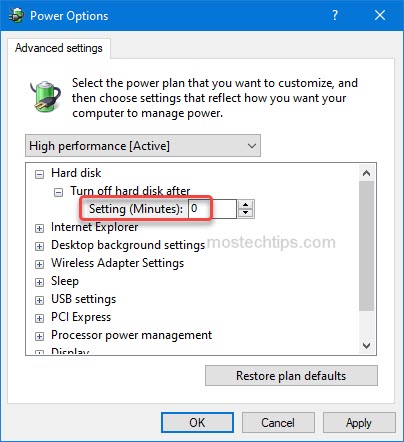
9) Click Apply -> OK to save the changes.
10) Check to see if the error is resolved.
Method 5: Turn off fast startup
One of the causes to the Kernel-Power Critical 41 error is the enabled fast startup. To fix the error, you can try to turn off fast startup. To do so:
1) On your keyboard, press Win+I (the Windows logo key and the I key) at the same time open the Settings window.
2) Click on System.

3) Click on Power & sleep on the left pane, then click on Additional power settings on the right pane.
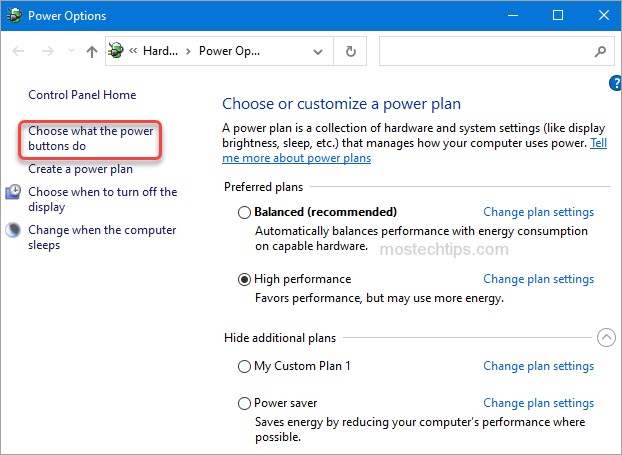
4) Click on Choose what the power buttons do on the left pane.
5) Click on Change settings that are currently unavailable.
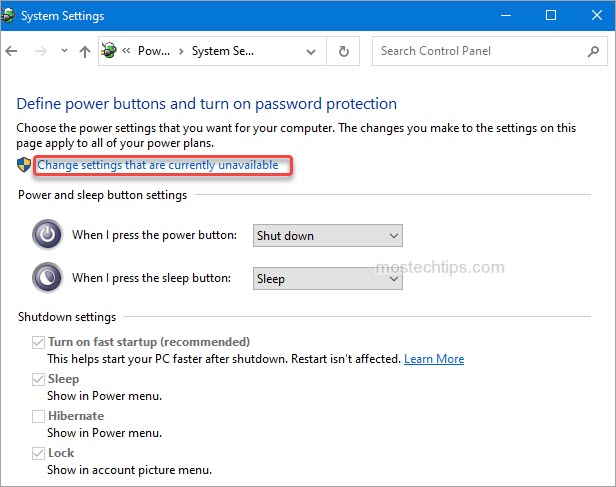
6) Uncheck Turn on fast startup (recommended) and click Save changes.
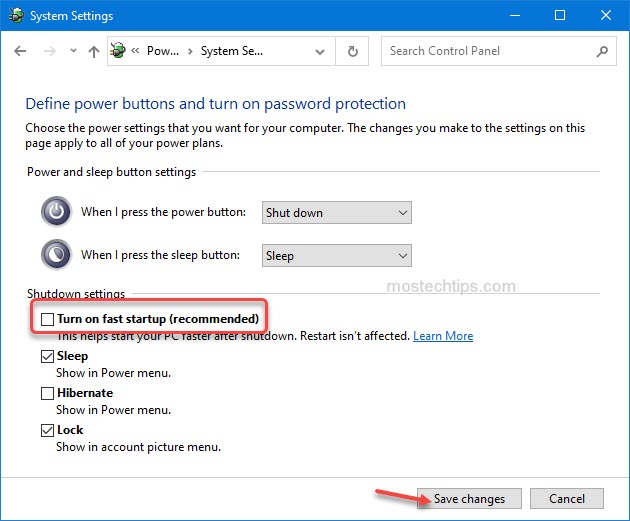
7) Check to see if the error is resolved.
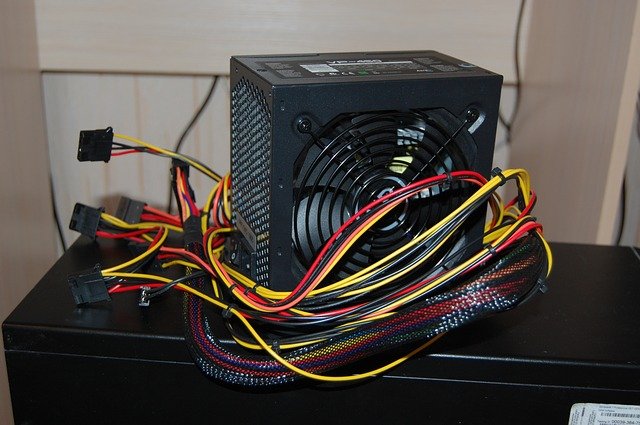
Method 6: Replace the PSU
The last method you can try is to replace your PSU (Power Supply Unit) with a new one. If your computer is still under warranty, you can just contact the manufacturer and ask for a new PSU.
If not, you’ll need to replace it on your own. Before you buy a new PSU, it’s recommended you test it. If you have no idea how to replace the PSU, you should go to the computer repair store to have it fixed.
Hopefully you find this article helpful. If you have any questions, ideas or suggestions, feel free to leave a comment below.
