

You try to put your computer into Sleep Mode, but you find the option missing in the Power menu. What’s happening? Not to worry, as many Windows 10 users have reported this issue, you’re not alone. You can fix the problem quickly & easily with the methods below.
I’ve included three methods below to fix the problem. You may not have to try them all; just work your way down the list until you find the one that works for you.
Method 1: Check the power settings
Method 2: Configure the power management setting in Local Group Policy Editor
Method 3: Configure another power management setting in Local Group Policy Editor
Method 1: Check the power settings
The Sleep option in the power settings can be disabled by some updates, for example, Windows Update. If it’s disabled, the Sleep option can be missing in the power menu. So you can check the power settings to see if the Sleep option is disabled. If it’s diabled, just enable it. To do so:
1) On your keyboard, press Win+R (the Windows logo key and the R key) at the same time to invoke the Run box.
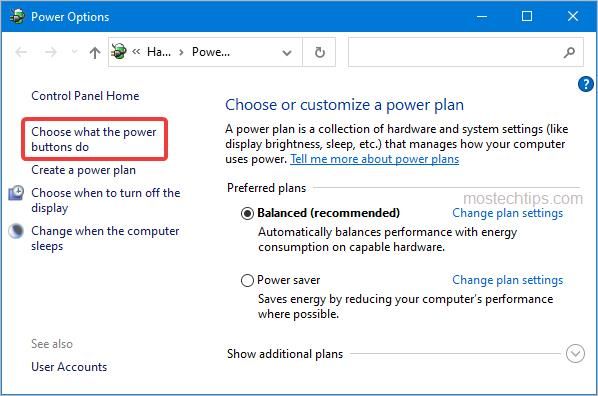
2) Type ‘powercfg.cpl’ into the Run box and click OK to open the Power Options window.

3) Click on Choose what the power buttons do.
4) Click on Change settings that are currently unavailable.

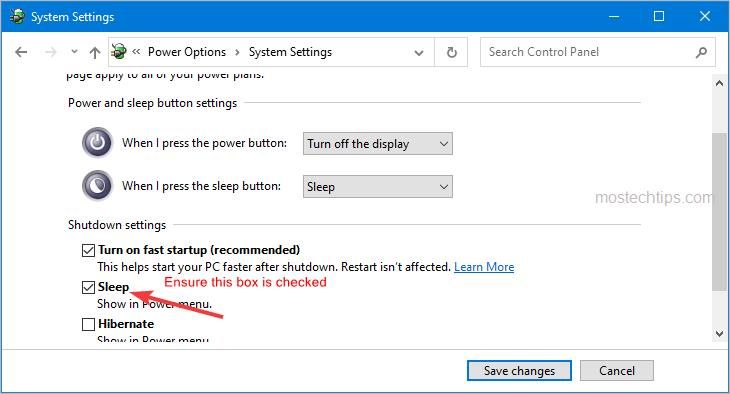
5) Under Shutdown settings, check if the box next to Sleep is ticked. If it’s not ticked, click to tick it, then click the Save changes button. The change will take effect immediately, just check to see if the Sleep option shows up in the Power menu.
If it’s grey out and unavailable for you to tick, it probably is disabled in Local Group Policy. Then try Method 2 and Method 3.
Method 2: Configure the power management setting in Local Group Policy Editor
In Group Policy Editor, if the Show sleep in the power options menu setting is configured to Disabled, the Sleep option will be missing in the Power menu. You can follow the below steps to check and configure this setting.
1) Open the Run box again.
2) Type ‘gpedit.msc’ into the Run box and click OK to open the Local Group Policy Editor.

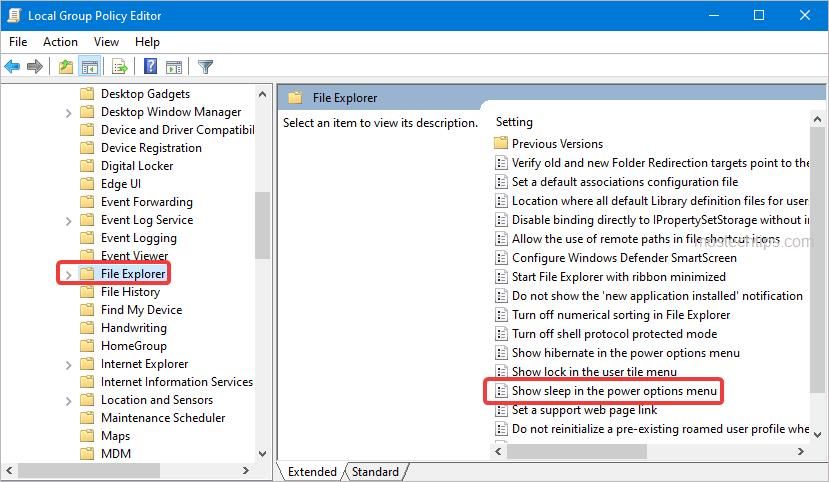
3) Navigate to Computer Configuration -> Administrative Templates -> Windows Components -> File Explorer. Then double-click on Show sleep in the power options menu in the right pane.
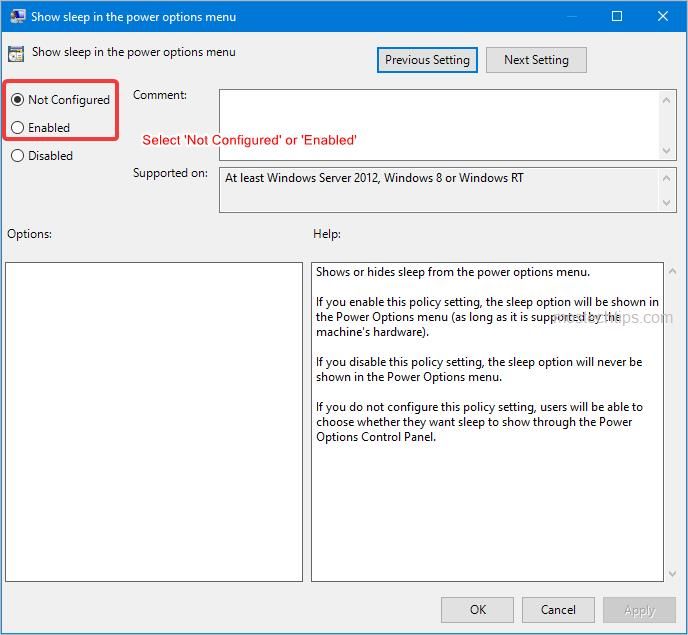
4) On the Show sleep in the power options menu window, check if the option Disabled is selected. If it’s selected, deselect it by clicking either the Not Configured option or the Enabled option. Then click Apply -> OK to apply the changes. After that, check if the problem is resolved. If it’s still not resolved, try the next method.
Method 3: Configure another power management setting in Local Group Policy Editor
Another power management setting in Local Group Policy Editor can also make the Sleep option missing in the Power menu. It’s the Allow standby states (S1-S3) when sleeping (plugged in) setting. If this setting is configured to Disabled, you’re not able to see the Sleep option in the Power menu, even though you enabled the Show sleep in the power options menu setting. So check if this setting is configured to Disabled and configure it if necessary. To do so:
1) Open the Local Group Policy Editor again.
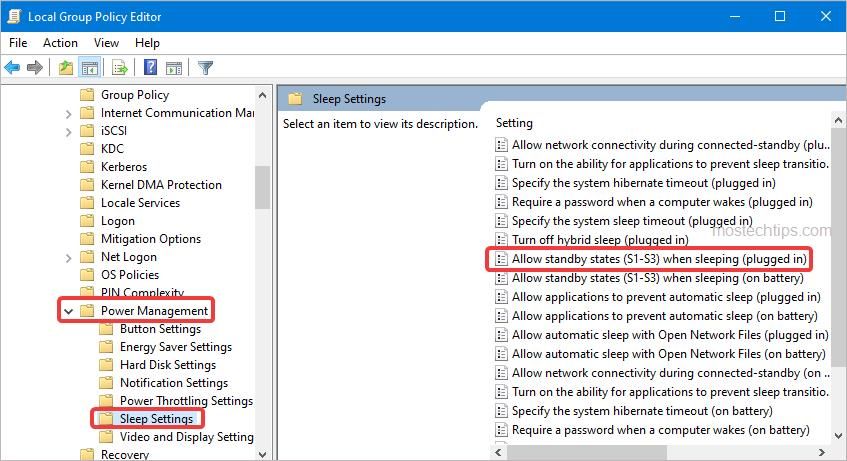
2) Navigate to Computer Configuration -> Administrative Templates -> System -> Power Management -> Sleep Settings, then double-click on Allow standby states (S1-S3) when sleeping (plugged in) in the right pane.
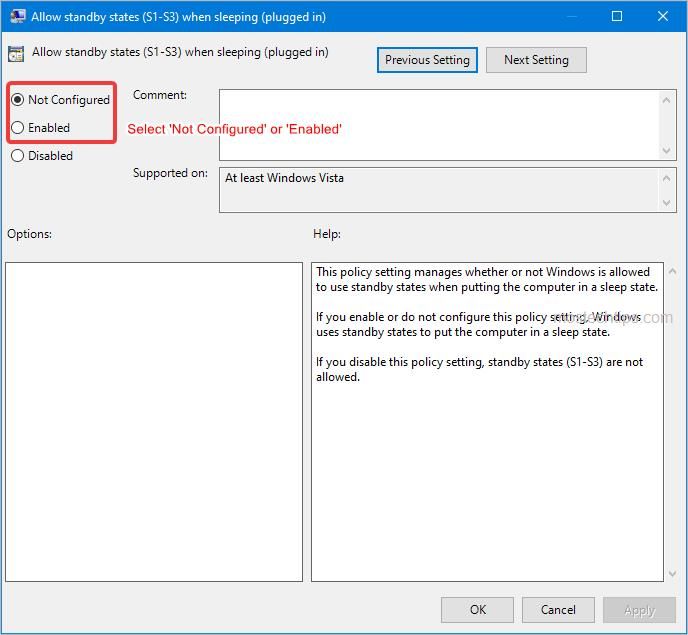
3) On the pop-up window, check if the Disabled option is selected. If it’s selected, deselect it by clicking either the Not Configured option or the Enabled option. Then click Apply -> OK to apply the changes. After that, check if the problem is resolved.
Hopefully you can fix the Sleep missing in Windows 10 issue with the above methods. If you have any questions, ideas or suggestions, feel free to leave a comment below.