

For whatever reason, you may want to check the .NET Framework version installed on your computer, then you’ve come to the right place. In this post, I’ll show you how to check the .NET Framework version using PowerShell and other three tools.
[Summary]
How to check .NET Framework version using Powershell
Other three ways to check .NET Framework version
How to check .NET Framework version using PowerShell
You can easily use PowerShell to check the .NET Framework version installed on your computer. Here’s how to do it:
1) Right-click on the Start menu button at the bottom corner of the desktop and select Windows Powershell (Admin). Then Powershell will open as administrator.

2) At the PowerShell window, type the following command (you can copy and paste the command), then press Enter:
Get-ChildItem ‘HKLM:\SOFTWARE\Microsoft\NET Framework Setup\NDP’ -Recurse | Get-ItemProperty -Name version -EA 0 | Where { $_.PSChildName -Match ‘^(?!S)\p{L}’} | Select PSChildName, version
This will list all .NET Framework versions installed on your computer (Your computer can have multiple versions of .NET Framework installed). In the following figure, for example, you can see v2.0, v3.0, v3.5 and v4.8 installed on the computer. For most modern computers, the most recent .NET Framework version installed is v4.8, which is also the latest version provided from Microsoft.

FAQ: Why are v4.0, v4.5, v4.6 and v4.7 not installed?
From v4.0, whenever there is a newer version installed, the newer version will be an in-place upgrade for the previous version. For example, .NET Framework 4.5 was an in-place upgrade for 4.0. When .NET Framework 4.5 is installed, .NET Framework 4.0 will be replaced and not be seen on your computer.
Other three ways to check .NET Framework version
You can also use one of the three ways below to check the .NET Framework version.
How to check .NET Framework version using Command Prompt
How to check .NET Framework version using File Explorer
How to check .NET Framework version using Registry Editor
How to check .NET Framework version using Command Prompt
You can use Command Prompt to check the .NET Framework version. To do so:
1) On your keyboard, press Win+R (the Windows logo key and the R key) at the same time to invoke the Run box.
2) Type “cmd” into the Run box and press Ctrl+Shift+Enter to open Command Prompt as administrator.

3) At the Command Prompt window, type the following command (you can copy and paste the command), then press Enter:
reg query “HKLM\SOFTWARE\Microsoft\Net Framework Setup\NDP” /s
This will list all .NET Framework versions installed on your computer. Look for the Version REG_SZ lines which will display the version of .NET Framework.

How to check .NET Framework version using File Explorer
You can check the .NET Framework version through File Explorer. Follow these steps:
1) Open File Explorer.
2) Navigate to C:\Windows\Microsoft.NET\Framework.
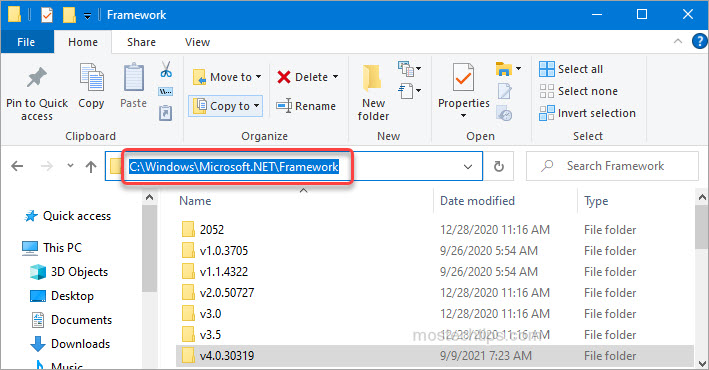
In the Framework folder, you’ll see the versions of .NET Framework you have (you can tell from the name of the folders).

Note you’re not able to know the most recent version of .NET Framework from the folder’s name. The folder with the highest number is v4.0.30319. It doesn’t mean the highest version you have is v4.0.30319.
From v4.0, a newer version would perform an in-place upgrade from the previous version. Whenever a newer version is available, they will be installed to the folder v4.0.30319 and replace the previous version. So if you want to check the latest version of .NET Framework, you need to open the folder v4.0.30319 and check from the files.
Here’s how to do it:
1) In the folder v4.0.30319, right-click on one of the .dll files, for example, Accessibility.dll, and select Properties.

2) Go to the Details tab and then look for the value next to the Product version, which is the latest version of .NET Framework. In the following screenshot, the latest version of .NET Framework is 4.8.04084.

How to check .NET Framework version using Registry Editor
You can check the .NET Framework version using the Registry Editor. To do so:
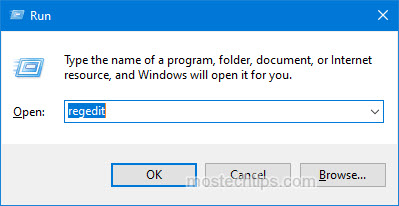
1) On your keyboard, press Win+R (the Windows logo key and the R key) at the same time to invoke the Run box.
2) Type “regedit” into the Run box and click OK. Then the Registry Editor window will pop up.
3) Copy and paste the following path to the search box, then press Enter:
HKEY_LOCAL_MACHINE\SOFTWARE\Microsoft\NET Framework Setup\NDP
You’ll see the version keys under NDP.

4) Double-click on one of the version keys then you can check the version value in the right pane. The following screenshot shows the version value is v4.8.04084.

Hopefully you find the article helpful. If you have any questions, feel free to leave a comment below. I’ll get back to you ASAP.
Hi! Thank you for sharing this. 🙂
I found a similar registry location for the modern .NET (or “Core”) versions, and I adapted your PowerShell script into a function here:
https://gist.github.com/Nevember/9d41541acb83bf34e047cecac7131560
Hope you don’t mind! I credited you in the function’s help section. 🙂
No probs. Glad you find the article helpful.