You want to watch the video you like, but something bad happens. The sound is sort of stuttering / distortion. It’s frustrating. But not to worry. You can fix the issue with the methods below.
Six methods are available to fix the problem. You can try them one by one until the problem resolves.
Method 1: Change the WiFi over to Ethernet
Method 2: Run audio troubleshooter
Method 3: Disable audio enhancement
Method 4: Change audio formats
Method 5: Reinstall Realtek audio driver
Method 6: Update the Realtek audio driver
Method 1: Change the WiFi over to Ethernet
Sound stuttering/distortion can be caused by WiFi connection. If you’re using a WiFi network, change it over to Ethernet.
If this method doesn’t work for you, try other methods.
Method 2: Run audio troubleshooter
Windows built in audio troubleshooters can detect different kinds of sound issues. You just need to follow the wizard to fix the problem.
Here’s how to run audio troubleshooter:
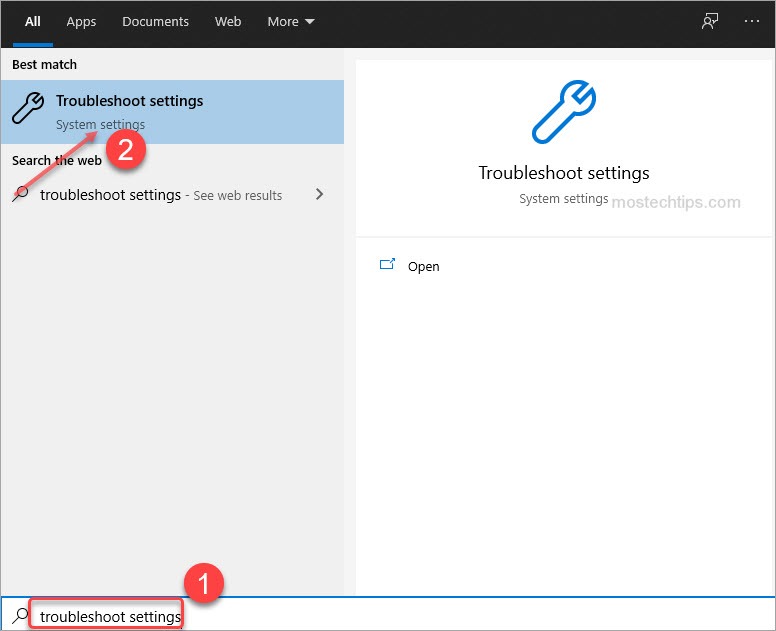
1) On your keyboard, press Win+S (the Windows logo key and the S key) to open search.
2) Type ‘troubleshoot settings’ into the search box and select Troubleshooter settings from the result list.
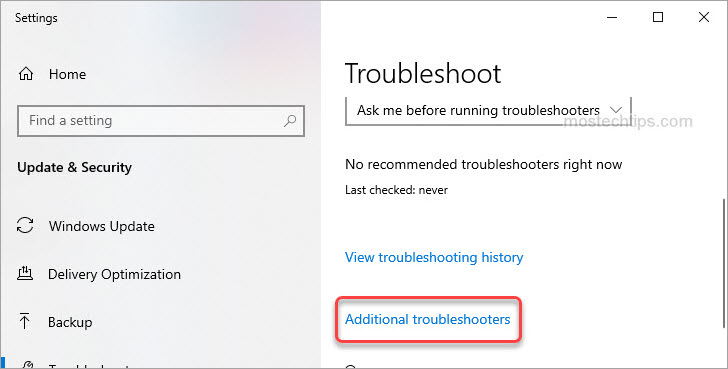
3) Click on Additional troubleshooters.
4) Click on Playing Audio -> Run the Troubleshooter.
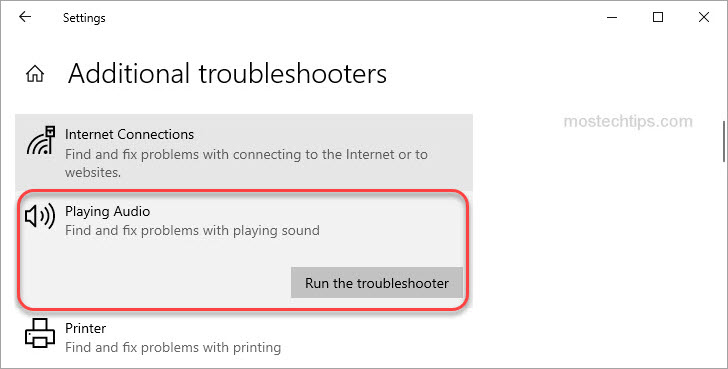
5) Follow the wizard to finish the troubleshoot.
Method 3: Disable audio enhancement
Audio enhancement can make the computer sound better. But if it’s set improperly, it can cause sound problems like audio stuttering.
To fix the problem, you can try to change the enhancement settings, and check if it helps. Follow these steps:
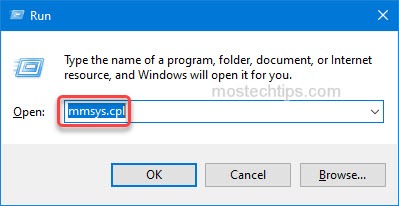
1) On your keyboard, press Win+R (the Windows logo key and the R key) at the same time to invoke the Run box.
2) Type in ‘mmsys.cpl’ into the run box and click OK to open the Sound window.
3) Right-click on something like Speakers / Headphones and click Properties.
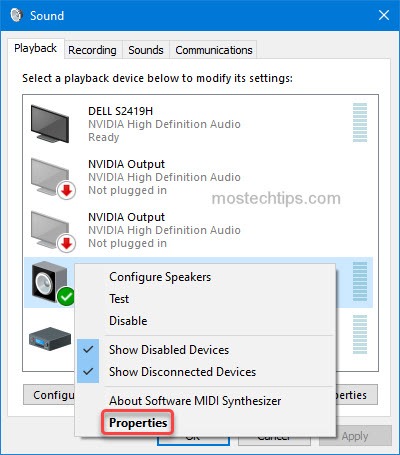
4) Select the Enhancements tab, and check the Disable all enhancements box. Click Apply and OK to save. If you don’t see the Enhancements tab, skip this method.
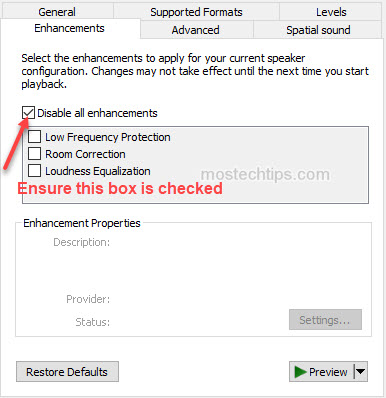
5) Check to see if the audio stuttering issue persists.
Method 4: Change audio formats
The audio stuttering issue can be caused by improper audio formats. You can try to change the current audio formats and see if the problem can be resolved.
Follow these steps:
1) On your keyboard, press Win+R (the Windows logo key and the R key) at the same time to invoke the Run box.
2) Type in ‘mmsys.cpl’ into the run box and click OK to open the Sound window.
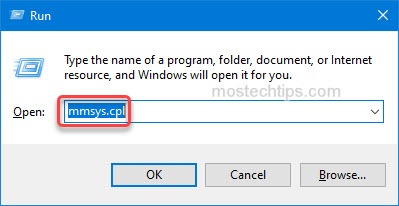
3) Right-click on something like Speakers / Speakers and click Properties.
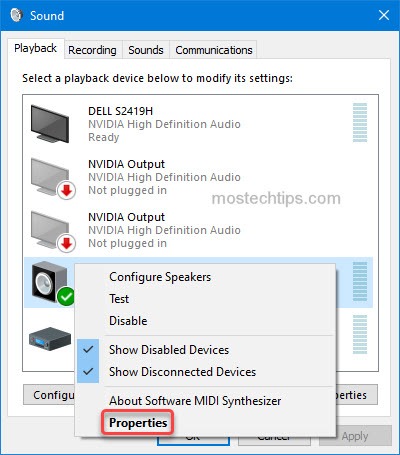
4) Select the Advanced tab and select a format from the Default Format list. The format can be 24bit, 48000 Hz (Studio Quality).
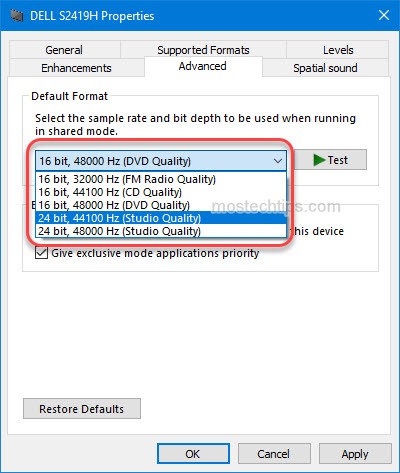
5) Click Apply -> OK to save the changes.
6) Check to see if the problem is resolved. If not, try other formats by repeating the step 3) to step 5) until you find the one that resolves the problem.
Method 5: Reinstall Realtek audio driver (one or more audio service)
Faulty Realtek audio drivers can cause sound stuttering issues. If you want the audio plays without problems, you’ll need to ensure the Realtek audio driver is working properly.
To fix the problem, you can try to reinstall the Realtek audio driver. To do so:
1) On your keyboard, press the Win+R (the Windows logo key and the R key) at the same time to invoke the Run box.
2) Type ‘devmgmt.msc’ into the box and click OK.
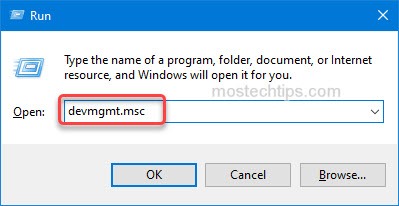
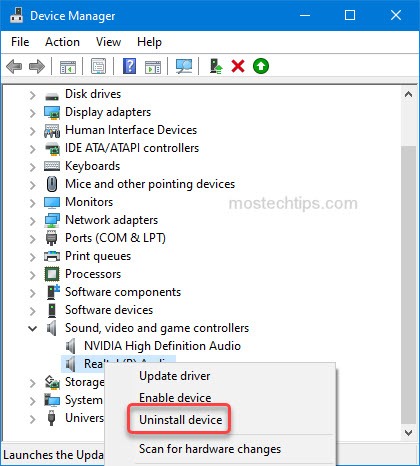
3) Expand the category ‘Sound, video and game controllers’. Right-click on the Realtek audio device and select Uninstall device.
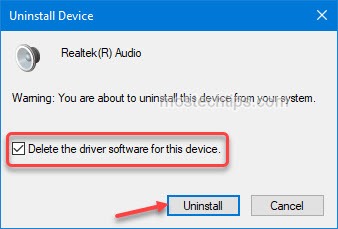
4) On the Confirm Device Removal dialogue, you’ll see a warning message that says “You are about to uninstall this device from your system”. Just check the box Delete the driver software for this device then click Uninstall to confirm the changes.
5) Restart your computer to allow Windows to reinstall the audio driver.
6) Check to see if the problem is resolved.
Method 6: Update the Realtek audio driver
The last method you can try is to update the Realtek audio driver. You can download the latest Realtek audio driver from PC manufacturer or Realtek official. Before getting started, you need to find out what Windows 10 version you have (32-bit or 64-bit), and what your PC model is.
Manually updating drivers can take forever if you have little driver knowledge. To save more time, you can use a third-party driver update utility to help you. Many driver update utilities allow you to update drivers with a few clicks. You just need to find a trustworthy one.
If you’re not sure which driver update utility is good to use, you can use Driver Booster.
With Driver Booster, you can easily update the audio driver with the friendly user interface. More importantly, you don’t need to know what your PC model is, what version of Windows is, etc.
Just click the Update button and the driver will be downloaded and installed automatically. So easy, right?

After updating the audio driver, the problem should resolve.
Hopefully you find this article helpful. If you have any questions, ideas or suggestions, feel free to leave a comment below.

