
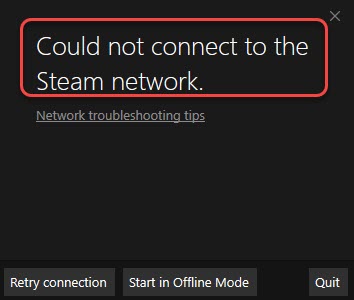
When you launch Steam, you keep getting an error that says “Could not connect to the Steam network”. What to do to fix this error? Following are the possible solutions that you can try.
Try these methods
Method 1: Run Steam as administrator
Method 2: Change the internet protocol for Steam
Method 3: Change the Internet Explorer settings
Method 4: Update network drivers
Method 5: Delete all Steam files
Method 6: Try reinstalling Steam and games
Method 1: Run Steam as administrator
To fix the Steam Could not connect to the Steam network error, the simple and effective solution you can try is run Steam as administrator.
Here’s how to do it:
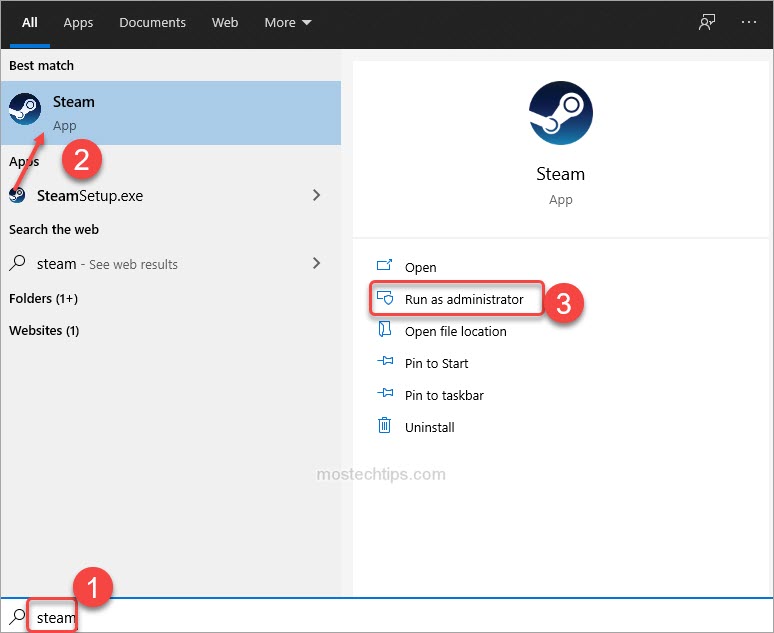
1) On your keyboard, press Win+S (the Windows logo key and the S key) at the same time to open Search.
2) Type ‘steam‘ into the search box, and click Steam from the result list then click Run as administrator.
3) Check to see if you still see the error.
Method 2: Change the internet protocol for Steam
One of the common causes to the error is the incorrect internet protocol that Steam uses. To fix the problem, you can try to change the internet protocol to TCP.
To do so:
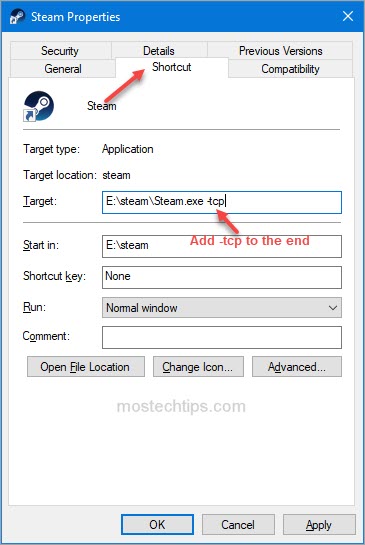
1) Right-click on the Steam shortcut and select Properties from the context menu.

2) Click the Shortcut tab and in the Target field, add ‘-tcp‘ to the end (shown as the below screenshot). Then click Apply -> OK to save the changes.
3) Launch Steam and see if the error persists.
Method 3: Change the Internet Explorer settings
Some users have reported they have resolved the error by changing the Internet Explorer settings. You can also give that a try. Just follow these steps:
1) Open Internet Explorer.
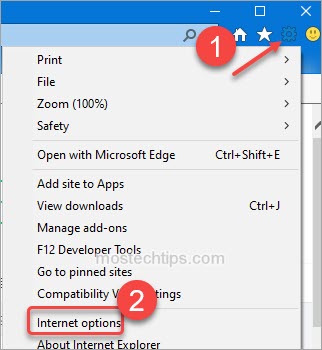
2) Click the Settings icon in the top right corner and select Internet options.
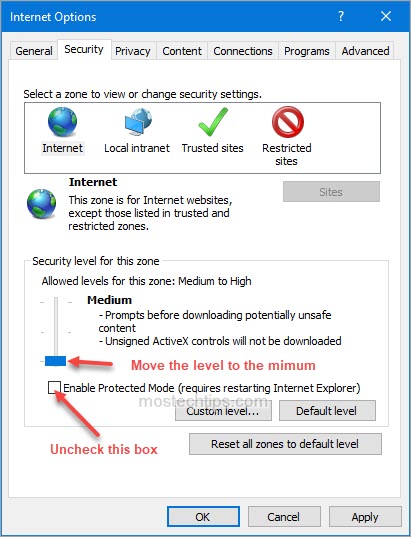
3) Click the Security tab and uncheck Enable Protected Mode. In the meantime, change the Security level to the minimum (shown as below screenshot).
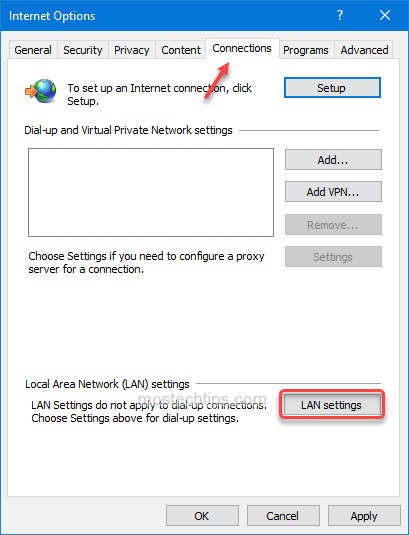
4) Click the Connections tab and click LAN settings.
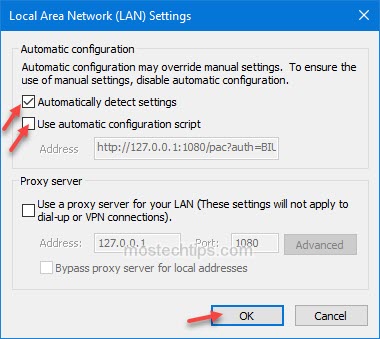
5) Uncheck Use automatic configuration script and check Automatically detect settings. Then click OK to save the changes.
6) On the Internet Options window, click Apply -> OK to save the changes.
7) Launch Steam and see if the error persists.
Method 4: Update network drivers
Faulty and outdated network drivers can cause Could not connect to steam network error. You can update the network drivers and see if it resolves the problem.
To update the network drivers manually, you can google with “PC name + drivers”, then you can go to the support page for the manufacturer, where you can download the network drivers.
Once downloading the drivers, you can double-click on the downloaded file and follow the on-screen instructions to install the driver.
If you find it hard to update the drivers manually, you can do it automatically with Driver Booster.
With Driver Booster, you can update the network drivers with just a few clicks.
1) Download and install it on your computer.
2) Launch it and click SCAN to scan your computer to detect any problem drivers.

3) Click the Update button next to the network driver to update the driver.

After updating the network drivers, check to see if the Could not connect to the Steam network error is resolved.
Method 5: Delete all Steam files
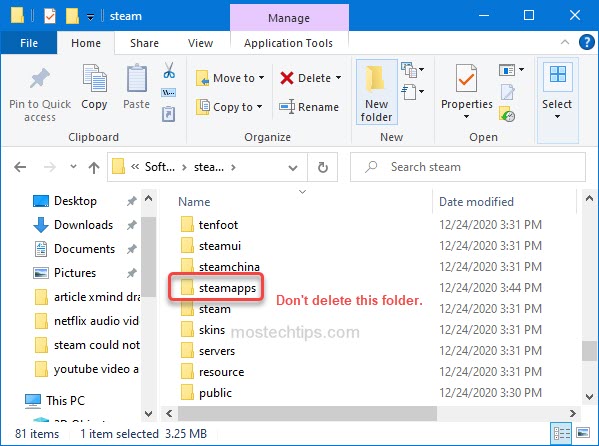
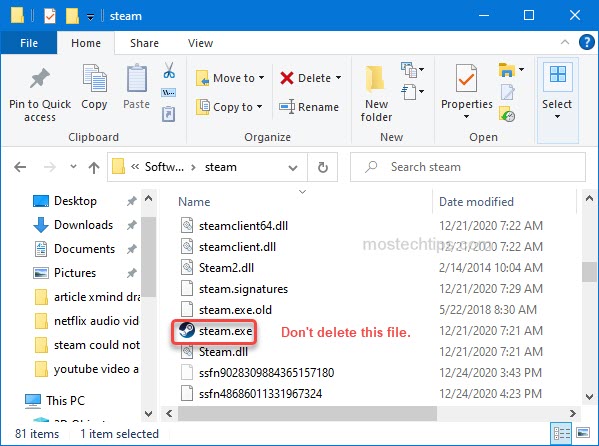
When you experience the Steam error: Could not connect to Steam network, it could be due to some corrupted files. If this is the case, you can manually delete all Steam files except the “steamapps” folder and the “steam.exe” file.
Here’s how to do it:
1) Go to the folder where you installed the Steam app. In the example below, Steam was installed in the ‘steam’ folder.
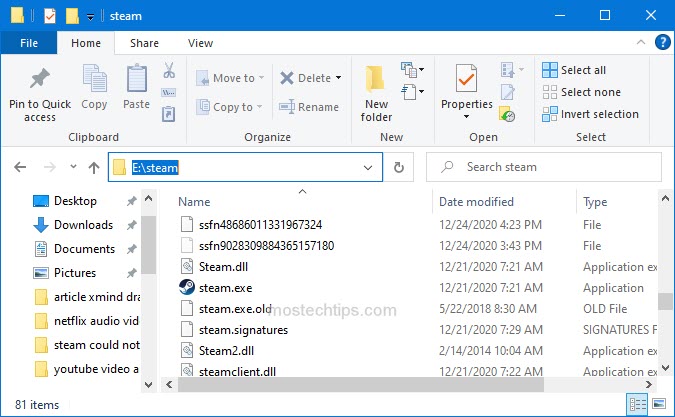
2) Delete all files in the folder except the ‘siteapps‘ folder and the ‘steam.exe‘ file.
3) Launch Steam and check if the error is resolved.
If this method doesn’t work for you, you may need to reinstall Steam. See Method 6.
Method 6: Try reinstalling Steam and games
The last method you can try is to reinstall Steam and games. Follow these steps:
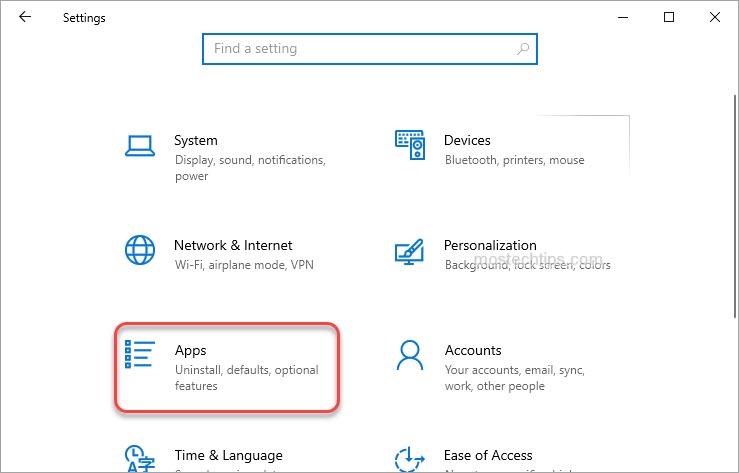
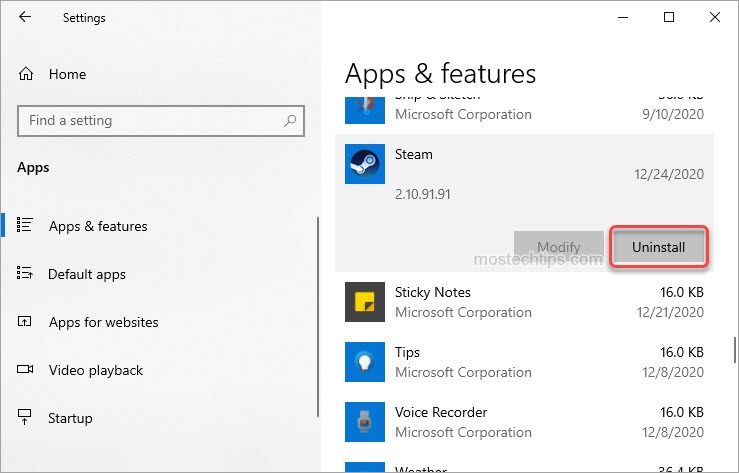
1) On your keyboard, press Win+I (the Windows logo key and the I key) at the same time to open the Settings window.
2) Click on Apps.
3) Click Apps & features in the left pane.
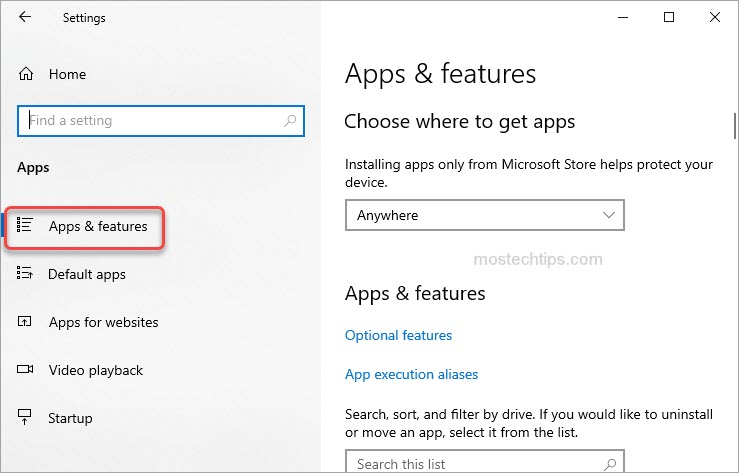
4) In the right pane, scroll down and click on Steam. Then click Uninstall and follow the on-screen instructions to uninstall Steam from your computer.
5) Restart your computer.
6) Install the Steam and the games again. Then the Could not connect to Steam network error should resolve.
Hopefully you can resolve the error with the methods above. If you have any questions, ideas or suggestions, feel free to leave a comment below.